An application user is required by any organization to create a communication channel between InsideView Apex and their Microsoft Dynamics CRM Online instance.
Note: InsideView Apex supports only the latest version of Microsoft Dynamics CRM Online. An application user can be created and configured by a Microsoft Dynamics System Administrator.
You can create an application user using these options:
- Create a New Integration and Application User
- Create a New Microsoft Dynamics CRM Integration
- Add an Application User to an Existing Integration
Create a New Integration and Application User
| Step | Description | Details |
|---|---|---|
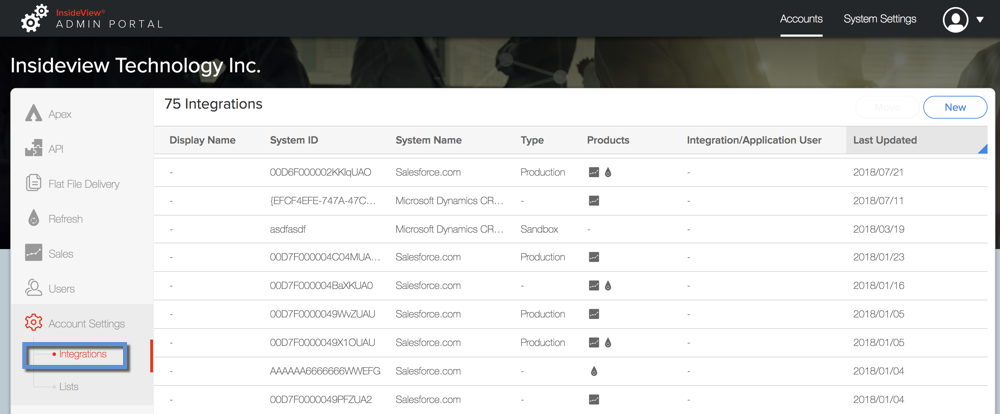
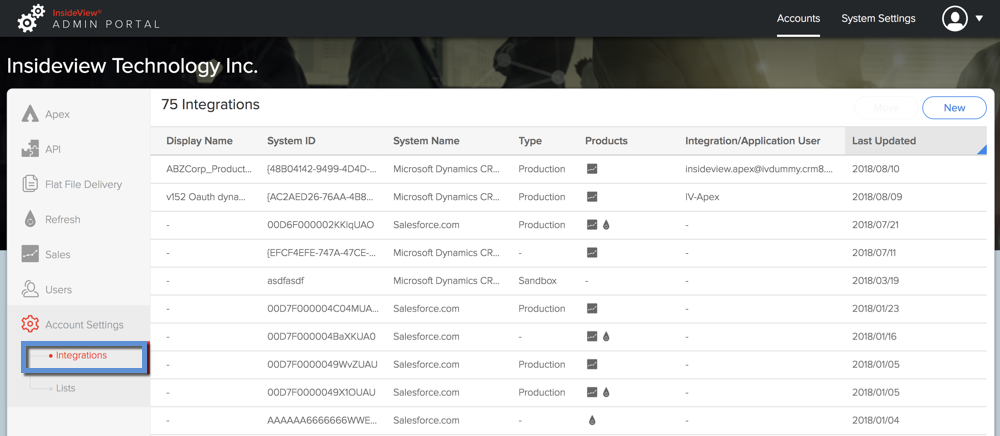
| 1 | Go to the Integration tab | Log in to InsideView Unified Admin Portal and go to Account Settings and select the Integrations option.
|
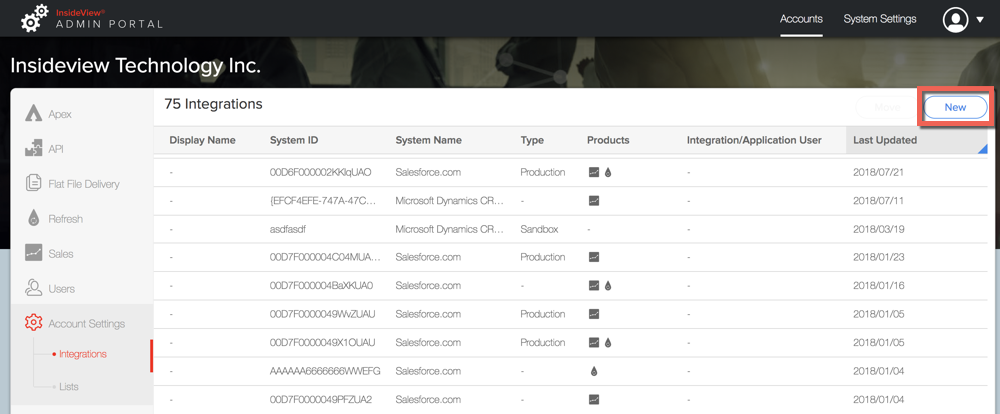
| 2 | Create a new integration | In the Integrations page list, click New.
|
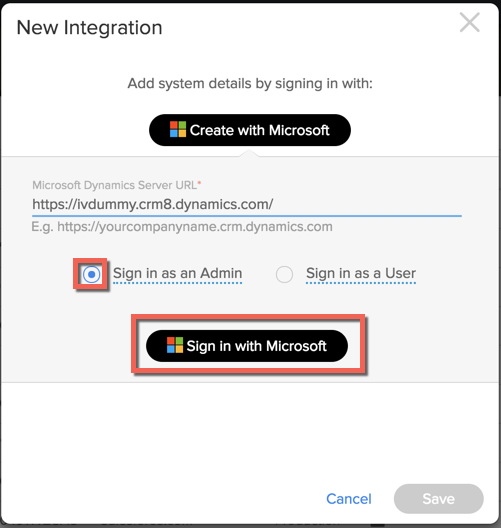
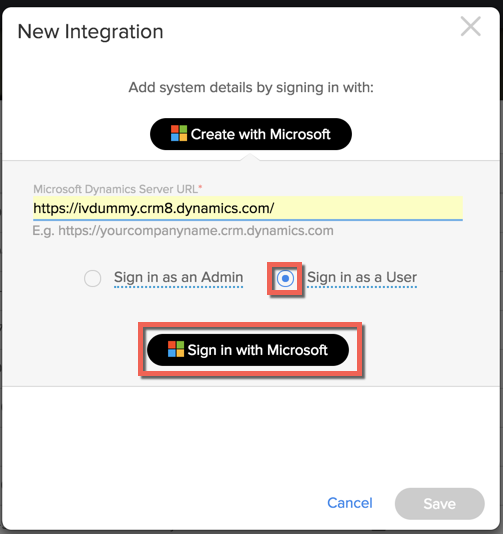
| 3 | Enter the integration details | In the New Integration dialog, enter the following integration user details:
Choose the Sign in as an Admin option to create both a Microsoft Dynamics CRM integration and an application user.
|
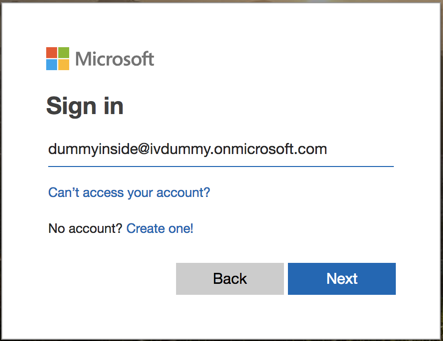
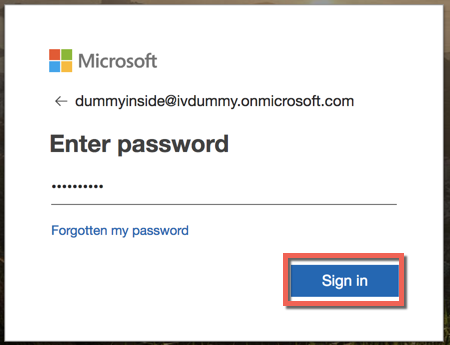
| 4 | Log in to Microsoft Dynamics CRM | Log in to the Microsoft Dynamics CRM with a user credentials based on your selection as illustrated below:
Click Next to enter password and then click Sign in.
|
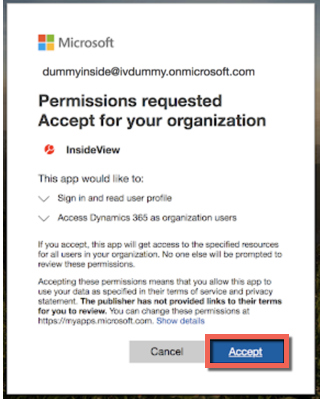
| 5 | Grant permissions | Once you sign in, the Permission Requested screen appears.
Click Accept. |
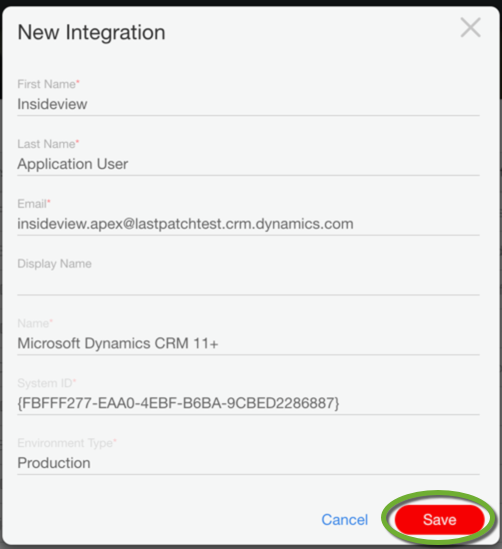
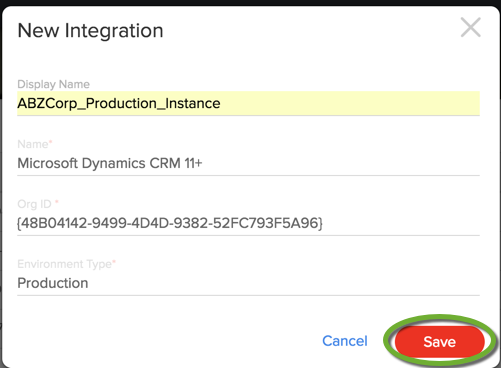
| 6 | Check the integration credentials | Once the access is granted, the Application User integration details are generated. By default, the application username is prefixed with “insideview.apex” followed by your organization's email domain. You can edit the First Name and Last Name fields. Enter the Display Name. The display name is used to easily identify an instance of the CRM. For example, ABZCorp_Production_Instance.
Click Save. Note: The Org ID is a unique identifier for your organization provided by Microsoft Dynamics CRM. It follows this alpha-numeric format {XXABXXXX-XXXX-XAXB-XXXX-XXCDXXXEXFXX}. |
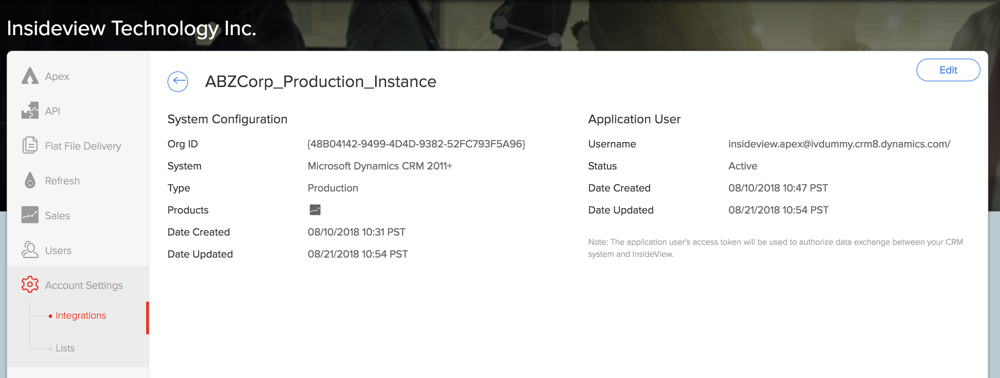
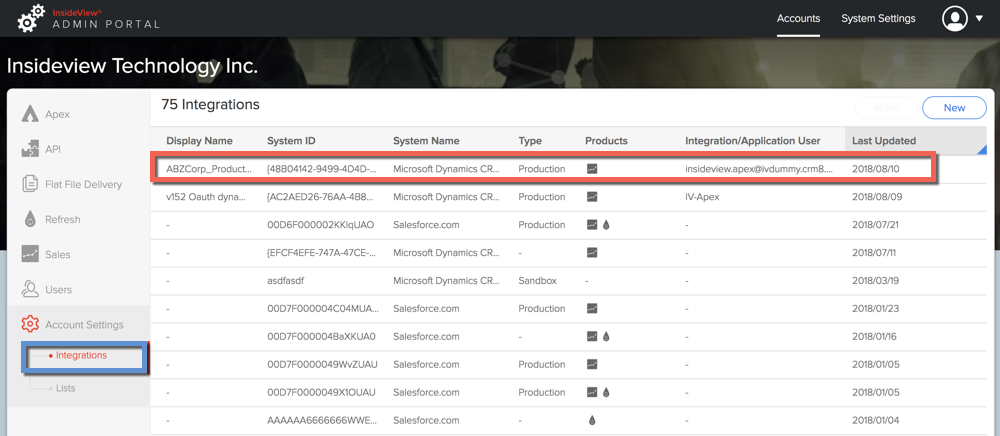
| 7 | Review details | Once the Microsoft Dynamics CRM integration and an application user is created, the following screen appears:
|
Create a New Microsoft Dynamics CRM Integration
To create a new Microsoft Dynamics CRM integration only for InsideView Apex, follow these steps:
| Step | Description | Details |
|---|---|---|
| 1 | Go to the Integration tab | Log in to InsideView Unified Admin Portal and go to Account Settings and select Integrations option.
|
| 2 | Create a new integration | In the Integrations page list, click New.
|
| 3 | Enter the integration details | In the New Integration dialog, enter the following integration user details:
Choose the Sign in as a User option to add a new Microsoft Dynamics CRM integration to establish a communication between the CRM and InsideView Apex. Note: This option allows you to create an integration with Apex, but it will not allow users in the organization to dynamically query their CRM. For that, an application user must be setup by an administrator.
|
| 4 | Log in and allow access | Log in to the Microsoft Dynamics CRM with a user credentials based on your selection as illustrated below:
Click Next to enter password and then click Sign in.
Once you sign in, the Permission Requested screen appears.
Click Accept. |
| 5 | Check the integration credentials | When you select the Sign in as a User option, the following screen appears without the Application User Name field:
|
| 6 | Save integration | Click Save. |
Add an Application User to an Existing Integration
To create an application user for an existing Microsoft Dynamics integration, follow these steps:
| Step | Description | Details |
|---|---|---|
| 1 | Go to the Integration tab | Log in to InsideView Unified Admin Portal and go to Account Settings and select Integrations option.
|
| 2 | Create an application user | In the Integrations page list, click on the Integration that you wish to edit.
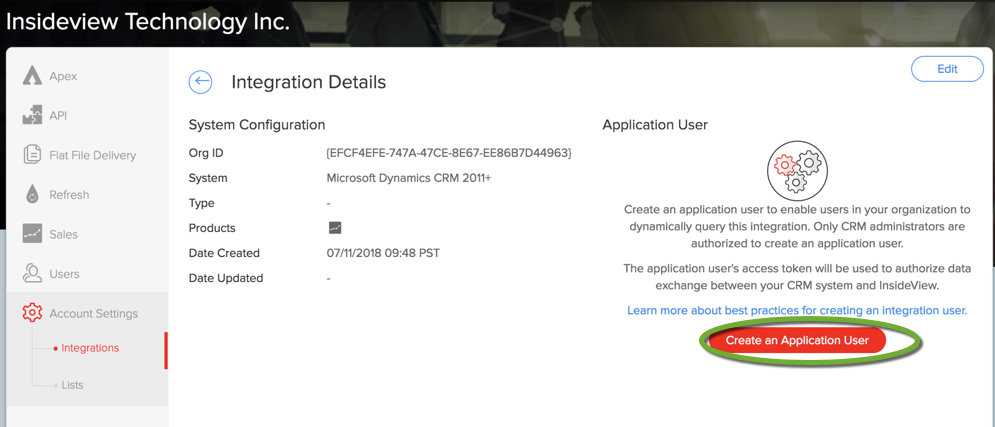
If a Microsoft Dynamics CRM integration already exists, then click the Create an Application User option in the Integration Details screen as illustrated:
|
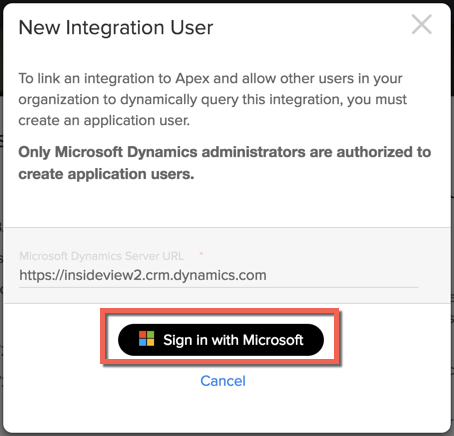
| 3 | Enter application user details | When you click Create an Application User, the following screen appears:
Click Sign in with Microsoft. Once you sign in, the Permission Requested screen appears.
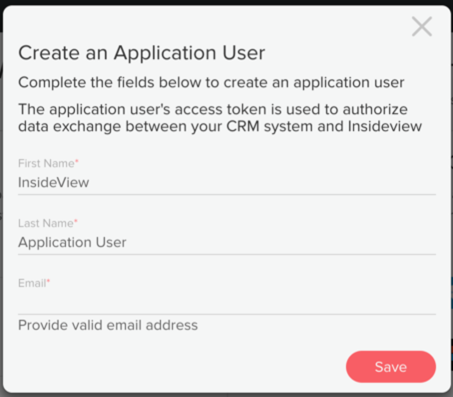
Click Accept, then you will see the following screen:
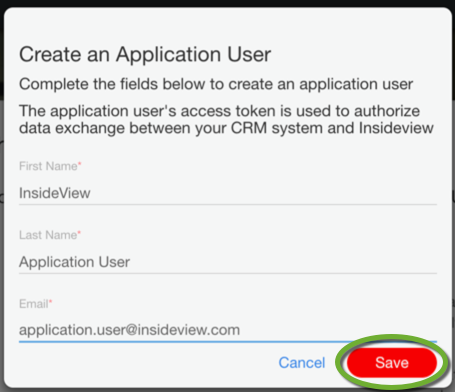
Enter the values for First Name, Last name, and Email fields.
Click Save. |
Edit the Display Name for an Integration
You can edit the display name for your Microsoft Dynamics Integration if required.
| Step | Description | Details |
|---|---|---|
| 1 | Go to the Integration tab | Log in to InsideView Unified Admin Portal and go to Account Settings and select Integrations option.
|
| 2 | Select the integration | In the Integrations page list, click on the Integration that you wish to edit.
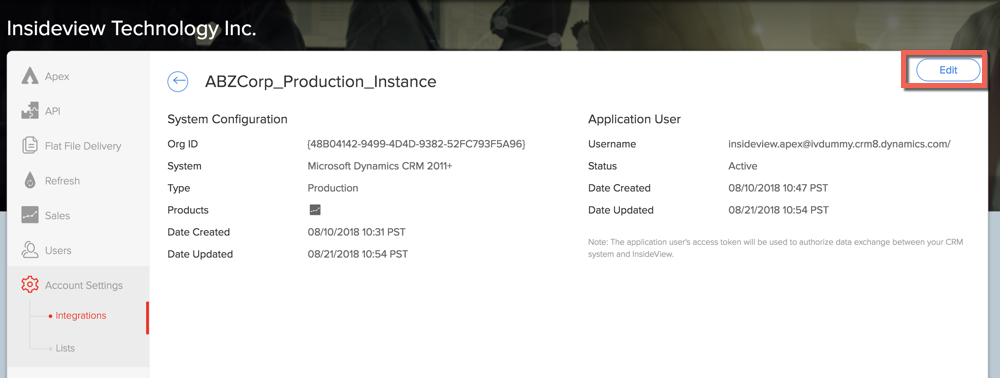
In the Integration Details page, click Edit.
|
| 3 | change the integration details | In the Edit Integration dialog, change the display name and click Save.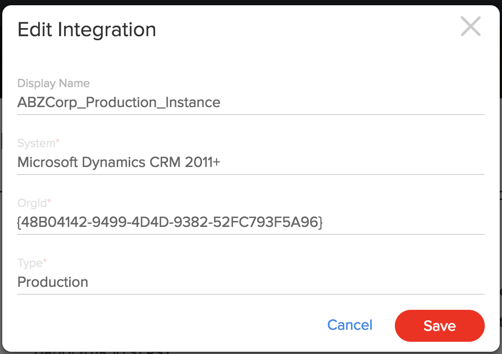
|
