| Step |
Description |
Details |
| 1 |
Log in to InsideView Apex |
Log in to InsideView Admin Portal with user credentials. |
| 2 |
Go to the List page |
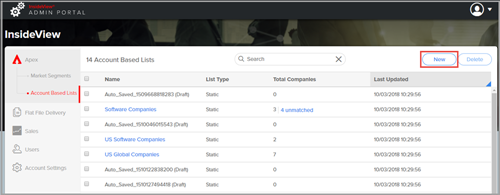
Click Apex in the left pane and select the Account Based Lists option. To create a new list, click New.
|
| 3 |
Create a static list |
To create a static list, you can choose any of the following options:
- Option A: Type or copy and paste company names that you want to add in the search box. You must copy and paste the company name in a new line for each one to be added.
Note: You can add up to 10,000 company names in any list.
For example, copy and paste each name below in a new line:
- Microsoft
- Apple
- InsideView
- Oracle
- Yahoo
- Alphabet
- When you type in a company name, the account names available in the InsideView database are populated as shown below with Microsoft as an example:
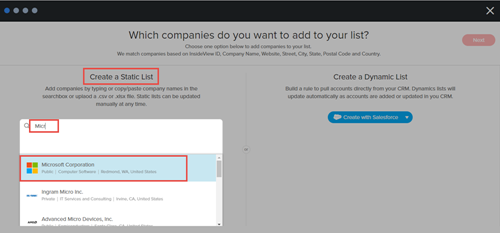
- Select the Microsoft Corporation company name.
- Repeat the same steps to select company names that you want to add.
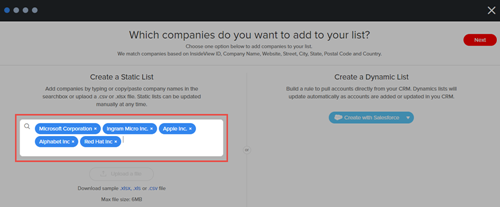
- Option B: You can also click Upload to select an .xlsx, .xls or .csv file with one or more of the following fields to create a company list:
- InsideView ID
- Company Name
- Website
- Street
- City
- State
- Country
- Zip
Note: Make sure InsideView ID, Company Name or Website field is in the file because it is mandatory to include at least one of these fields for creating a static list. All other fields are optional.
- You can use Option A or B, so if you have entered company names above, then you must remove all companies, then click Upload a file. In the Upload dialog, click Browse to select the file that you want to upload as illustrated below:
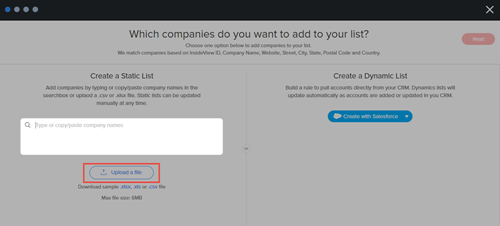
This article demonstrates the steps only for Option B: Uploading a data file below. The steps to match companies and review them are similar for Option A except the map fields in step 2.
|
| 4 |
Map fields |
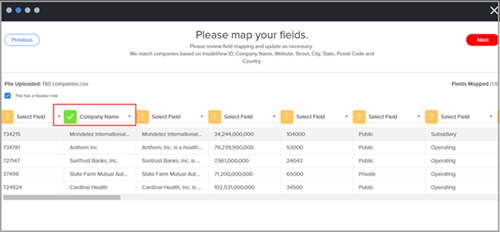
In the Map Fields page, select the fields that you want to map for companies uploaded. For example, select the Company Name and map it to the Account names that are pulled from the file that have uploaded.
|
| 5 |
Start matching process |
Click Next to start the matching process to find matches for companies in the InsideView database as illustrated below:
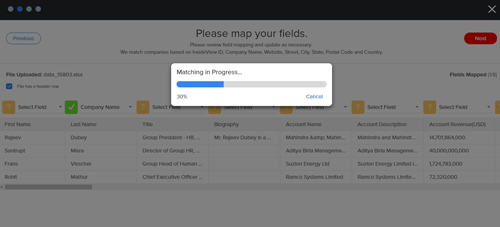
Once the matching process is complete, the match results appear.

- If a match is found, you will see the number of companies that are matched.
- If a suggested match is found, you will see the number of companies that have a suggested match.
- If a match is not found in the InsideView database, you will see the number companies that are unmatched. Where you need to help in finding a correct match.
|
| 6 |
Review Matches |
Click Review to view the details.
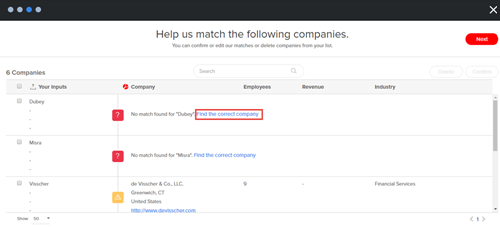
- If the company record is not found, click the Find the correct company link to find a match as illustrated below:
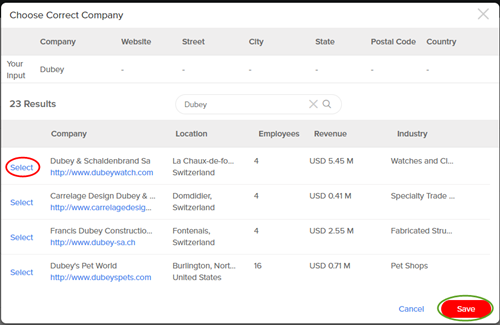
- On the Choose Correct Company window, enter the company name in the Search box, then select the correct company and click Save.
- Once all companies are matched, click Next.
|
| 7 |
Save |
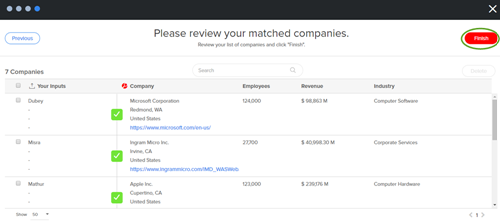
Review your list of matched companies and click Save.
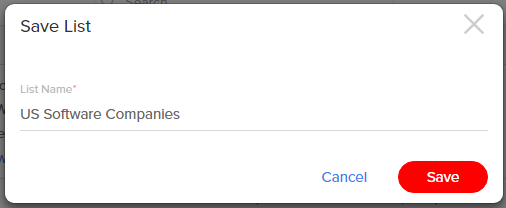
In the Save dialog, enter the name in the List Name field. For example, enter US Software Companies.
Once the list is saved, you can view the Recommendations of similar companies and companies that your target in your market segment region as illustrated below:
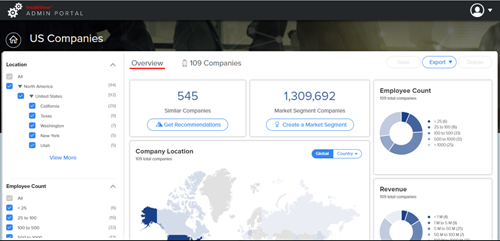
Notice the number of companies that are in your market segment; this shows your whitespace. There are 1,309,6692 companies in whitespace which you can target for new business. For more information, read the article Visualizing Market Segment's Whitespace in our Knowledge Base.
|


