This article outlines the process to complete your setup after your Target for Salesforce CRM account is authorized by an Customer Success Manager (CSM).
Only Account Administrators can configure the Target for Salesforce CRM.
Note: If your organization restricts network access to third party applications, please ask your IT administrator to add the following IP address ranges to allow updates from Demandbase:
-
52.4.63.192 to 52.4.63.223
-
64.56.203.0 to 64.56.203.255
Prerequisites
Before setting up Target for Salesforce, complete the following prerequisites:
- Check your Salesforce CRM version. Target is available only for Salesforce CRM Enterprise Edition and above. For more information on Salesforce CRM editions, refer to their help documentation.
- Create the required matching and duplicate (lead De-Duplication) rule references in your Salesforce CRM. For more information, read the Creating a Matching Rule for Leads in Salesforce and Creating a Duplicate Rule to Manage Leads sections below.
- Enable Bulk API settings in Salesforce CRM.
To view Bulk API settings in Salesforce CRM, go to Setup Manage Users Profiles (in Classic edition) or Setup Administration Users Profiles (in Lightning edition) and select the profile used to manage Target and verify if the API Enabled check box is selected. For example, select the System Administrator profile and view the settings as illustrated below:

For more information on enabling Bulk API settings, read the Salesforce CRM Online Help.
- Make sure you have a default selection for the Lead Record Type field. For example, the default Record Type value can be any field that you have selected for a lead.
Configuring Target for Salesforce consists of the following tasks:
Signing up for Target
Please reach out to your Demandbase CSM to sign up for a Target account. Also, for any credit allocation and authorization of your account please reach out to your CSM.
Creating an InsideviewId Custom Field
If you are setting up Target for Salesforce integration, it is mandatory for you to create an InsideviewId custom field in your CRM with string or TextArea datatype. You must map this field with any string/textarea datatype field in Target to sync leads into your Salesforce CRM.
Creating a Matching Rule for Contacts and Leads in Salesforce
To leverage the data matching and de-duplication capabilities of Salesforce CRM, you must set up a matching and duplicate rule references in your CRM and map those rules in your Target for Salesforce account. For more information on how to create matching rules for lead records in Salesforce CRM, read their Online documentation.
To create a matching rule, follow these steps:
| Step | Description | Details |
|---|---|---|
| 1 | Log in | Log in to Salesforce CRM. |
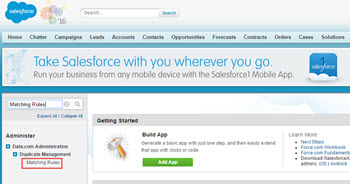
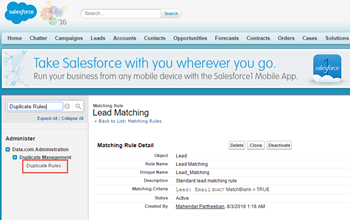
| 2 | Go to the Matching Rules page | In Classic edition, go to the setup and enter Matching Rules in the quick search box and click the link in the results as illustrated below.
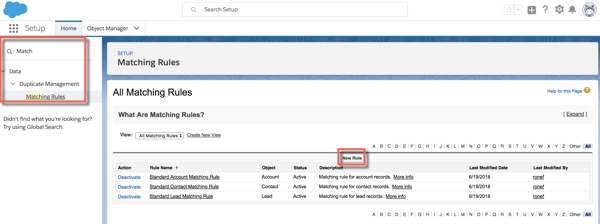
In Lightning edition, go to Setup Data Duplicate Management Matching Rules.
|
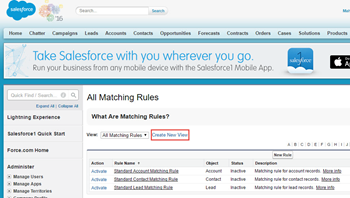
| 3 | Create a matching rule | In the Matching Rules page, click Create New View. |
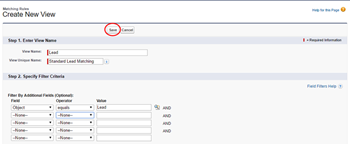
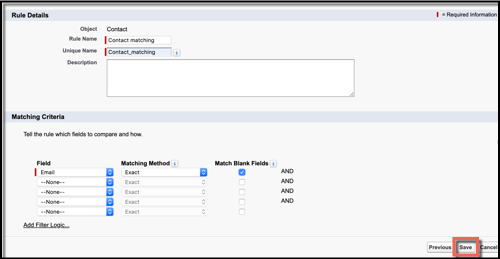
| 4 | Create a contact and lead matching view | In the New Matching View page, complete the following steps:
For Contact view, enter these details:
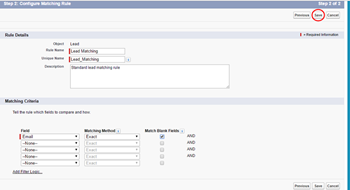
For Lead view, enter these details:
|
| 5 | Go to the New Rule page | Once Lead Matching View is saved, click New Rule.
|
| 6 | Create a contact and lead matching rule | In the New Matching Rule page, complete the following steps:
For contact matching rule, enter these details:
For lead matching rule, enter these details:
|
| 7 | Activate the contact and lead matching rule | In the Contact Matching Rule page, click Activate.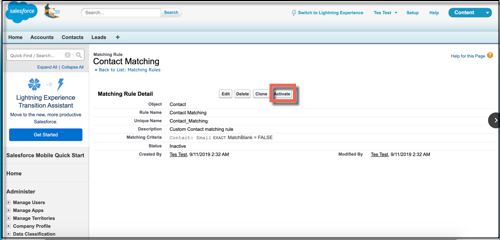
In the lead matching rule, click Activate. |
Creating a Duplicate Rule to Manage Contacts and Leads in Salesforce
Set up a duplicate rule to block the same contact and lead records in Salesforce. You can customize the logic that’s used to identify duplicates; and generate reports on the duplicates that users save. For more information on how to manage duplicate records, read Salesforce Online documentation.
To create a rule to block duplicate records of a lead, follow these steps:
| Step | Description | Details |
|---|---|---|
| 1 | Log in | Log in to Salesforce CRM. |
| 2 | Go to the Matching Rules page |
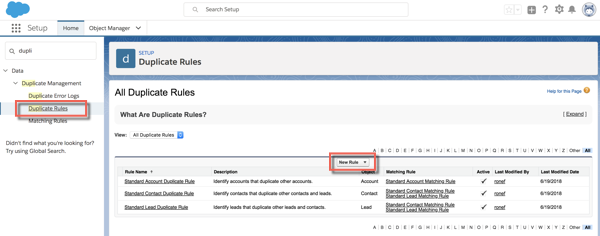
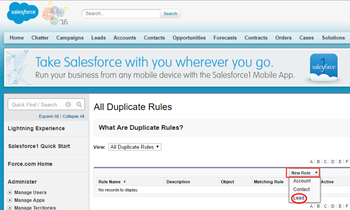
In Classic edition, go to the setup and enter Duplicate Rules in the quick search box and click the link in the results as illustrated below. In Lightning edition, go to Setup Data Duplicate Management Duplicate Rules. |
| 3 | Create a duplicate rule |
In the All Duplicate Rules page, click New Rule and select the Lead item. |
| 4 | Create a contact and a lead duplicate rule | In the New Duplicate Rule page, complete the following steps:
For contact duplicate rule, enter these details:
For lead duplicate rule, enter these details:
|
| 5 | Add Actions | In the Actions region, set the following items:
|
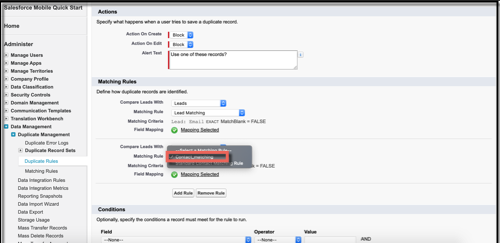
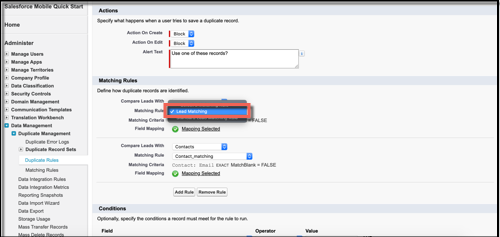
| 6 | Add the matching rule | In the Matching Rule region, complete the following steps:
For contact matching rule, enter these details:
For lead matching rule, enter these details:
|
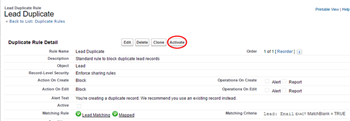
| 7 | Activate the duplicate rule | Once the Rule is saved, click Activate.
|
Configuring Target for Salesforce CRM
Follow these instructions to authenticate and configure Target for Salesforce:
| Step | Description | Details |
|---|---|---|
| 1 | Go to Demandbase Sales standalone | Go to https://my.insideview.com, or if you are on the Demandbase homepage. |
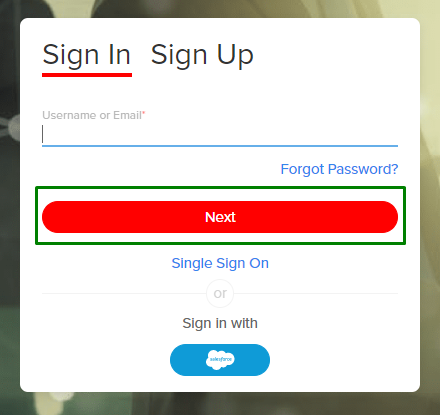
| 2 | Enter login credentials | Enter the Login Name (user ID) and Password for your Demandbase user account and click Next.
Note: Only Demandbase Account Administrators can set up the Salesforce CRM integration, so ensure you have logged in with the correct User ID. |
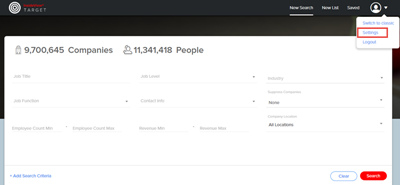
| 3 | Go to Settings | Once you log in to Demandbase Sales, click Build a List in the top menu and click Settings icon to expose the Authentication tab.
Note:Only when you log in with an Account Administrator user credentials, then Settings icon is displayed. |
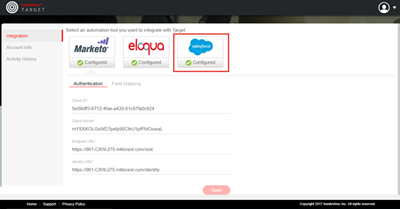
| 4 | Configure Salesforce CRM authentication | On the Configurations window, click the Salesforce icon.
If you want to use Salesforce Sandbox version, ask your CSM to enable the Sandbox access. When your CSM enables sandbox version, you will an addition Salesforce Sandbox Not Configured icon.
|
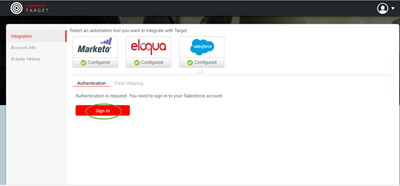
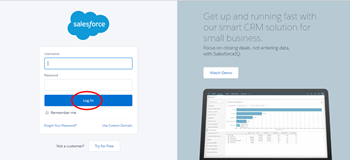
| 5 | Sign in to your Salesforce | On the Authentication tab, click Sign In.
|
| 6 | Authenticate Demandbase access |
|
| 7 | Review field mappings | Once configured, the Salesforce logo gets updated with a green Configured badge, and you can set up the Field Mapping.
|
| 8 | Check and map custom fields |
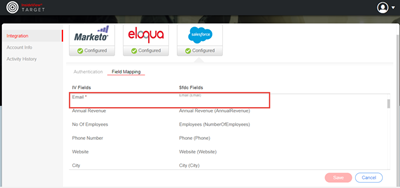
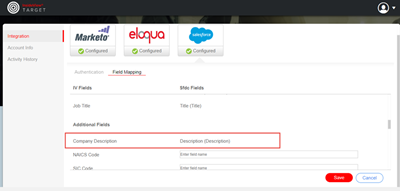
Custom Field Mapping is mostly automated. You can review the custom field mapping to see how Target matches Demandbase fields to standard fields in Salesforce. For example, Email automatically picks up the Salesforce email field. If you wish to edit the default mappings, select the pencil icon, which appears when you hover a field name. Note:By default, Target maps the Company Name, Last Name, Email and Insideview Id custom fields after successful configuration. If any of these fields are not mapped, you must create these custom fields with the string datatype in your Salesforce CRM and map them in Target. Otherwise, you cannot perform a sync to Salesforce. The screen below illustrates how to map the Company Description custom field.
IMPORTANT NOTES:
|
| 9 | Refresh Salesforce CRM | Refresh the Target instance in order to see this mapped fields in the drop-down list as illustrated below:
|
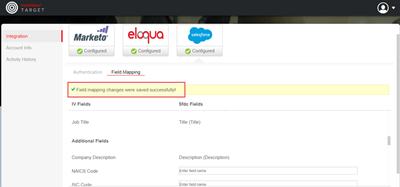
| 10 | Save changes | Click Save to make sure all changes are saved. |
Verifying a Successful Set Up
After your authentication credentials are configured and field mapping is complete, the last step is to verify that a list can be successfully exported.
Because Target is a credit-based system, and you do not want junk data in the system, it is best to create a list size of 1 for testing purposes.
De-duplication depends on email in order to be effective, and since most marketers want leads with email address, add the Contact Info field from in + Add Search Criteria options and select email.
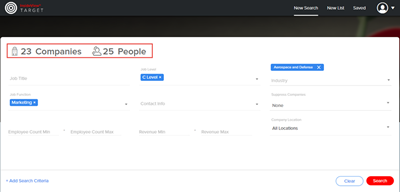
Build a sample list with Job Levels selected to further refine the People list as illustrated below:
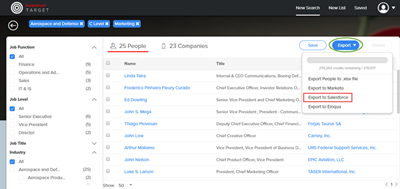
Click Export to Salesforce to export the list details in the Salesforce CRM.
Exporting a People List from Target to Salesforce
Target allows you to sync People lists directly into your Salesforce automation system.
| Step | Description | Details |
|---|---|---|
| 1 | Log into Demandbase Target |
Log into the Target with your credentials. |
| 2 | Export data into Salesforce |
Once the Salesforce account credential and field mapping is complete, click Export to Salesforce from the drop-down menu. |
| 3 | Accept sync messages | When you click Export to Salesforce, a series of messages will appear as illustrated below:
|
| 4 | Receive an email notification |
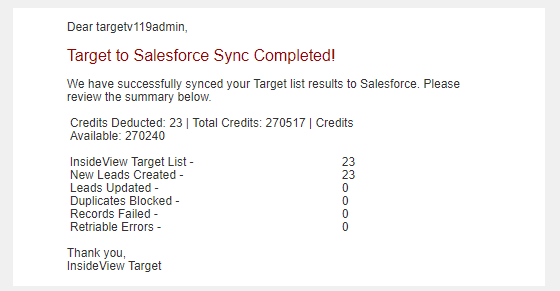
Once the People list is synced into Salesforce, you will receive an email notification confirmation with number of people that were moved to your Salesforce CRM as illustrated below: Once People list is imported, you can be confident that the set-up is complete and successful! Note: You can export a maximum of 50,000 records in an .xlsx file and sync upto 10,000 records in your Salesforce CRM. |
