Build a List in Salesforce CRM InsideView Refresh Integration

  • Created

InsideView Refresh allows you to receive updates for your Salesforce CRM account and contact data based on lists/rules that you define.

As soon as a list runs successfully, you will be able to review the total number of matches and updates processed by that list.

This article provides detailed instructions about how to build lists.

Step Description Details
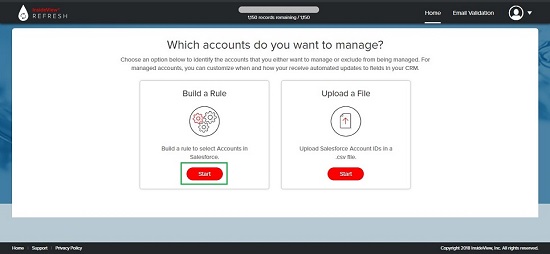
1 Go to the Home page To build a new list, click Start.

This screen appears when you are building a list for the first time in InsideView Refresh:

zero_data_small.jpg

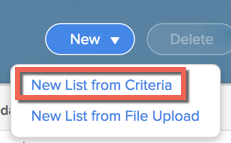
If you have already defined few lists, you need to choose any of the following option:

refresh_list1.png

For example, select the New List from Criteria option to build a new list using search criteria filters.

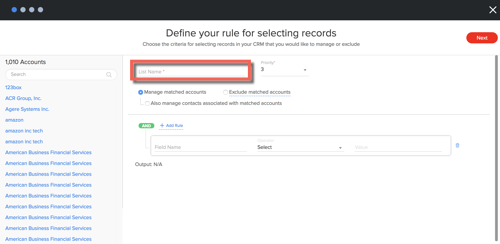
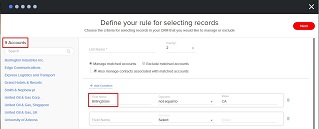
2 Define rule options In the Define your rule for selecting records page, enter the following list details shown:

refresh_list2_small.png

List Details

  • List Name – name of the list.
  • Priority – set the priority value from 1 to 3.
  • Manage matched accounts – choose either the Manage or Exclude option for matched accounts.
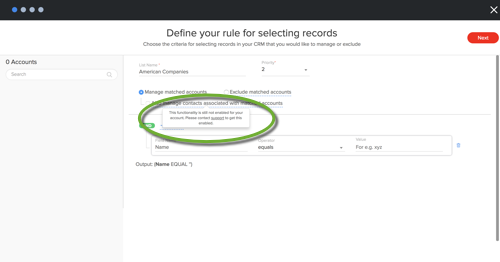
  • Also manage contacts associated with matched accounts – select this check box to receive contact matches and updates from your matched accounts. If this check box is not enabled for your InsideView Refresh account, the following error message appears. refresh_list3_small.png

    In this case, you must contact support@insideview.com to provision your account to manage contact matches and updates.

  • Add Rule - define the search filter criteria for your list with field name, operator and its value. Here are the filter criterion definitions:
    • Field Name – enter the field that you want to use to search for accounts. For example, you can enter Account Name or Account Type.
    • Operator – select an operator for the field that you want to match. For example, select equals, not equals, greater than or lesser than and so on.
    • Value – enter appropriate value for field and operator that you have selected. For example, for the account name field with operator equals you can enter account name keywords in the Value field.

Click Next.

Important Notes

  • If an account is captured in more than one list, it will only be managed by the list with the highest priority.
  • You can add up to four “Include” list and one "Exclude Only" list. You may also upload a file containing the accounts you want to manage.
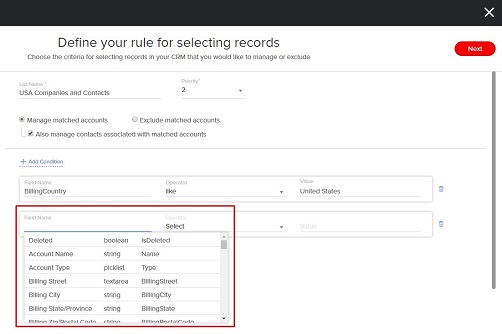
3 Enter the field criteria On the Add Rule region, enter the Field Name.       

2_-_Enter_field_criteria_small.jpg

Once you enter the first letter of the name, a list of field names is populated. Select a field name. 

If you are not sure why a field is not available, check the filterable fields from the Create View or Edit View section in Accounts object of your Salesforce CRM.

Note: You cannot create a list with any text area and descriptive fields. This is a Salesforce CRM limitation. For example, you cannot create a Refresh list with the Description field. 

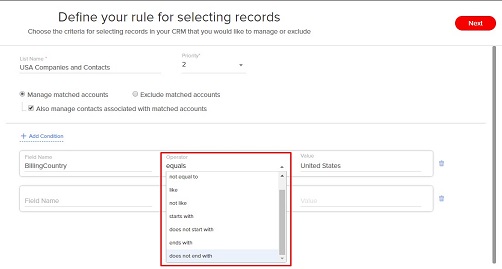
4 Select the Operator After entering the Field name, select the appropriate Operator.        

3_-_Select_Operator_small.jpg

You can choose the following values for the corresponding datatypes:

  • String: equals, not equal to, like, not like, starts with, does not starts with, ends with, does not end with.

  • Boolean: equals, not equal to. 

  • Picklist: equals, not equal to, like, not like, starts with, does not starts with, ends with, does not end with. 

  • Text area: equals, not equal to, like, not like, starts with, does not starts with, ends with, does not end with. 

  • Double/Number: equals, not equal to, greater than, greater or equal, less than, less or equal. 

  • URL: equals, not equal to, like, not like, starts with, does not starts with, ends with, does not end with.

5 Enter the field value Once you have entered Field name and selected an Operator, enter the Value for the field criteria.

Here are some examples of filters, showing the field used in Salesforce, an operator and a sample value:

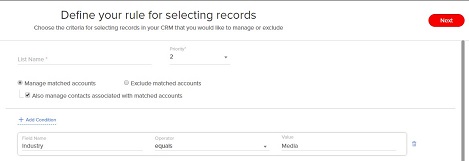
  • Select the industry field name, operator as equals and enter value as Media.

    This list will retrieve all accounts that have an industry type that equals to Media.

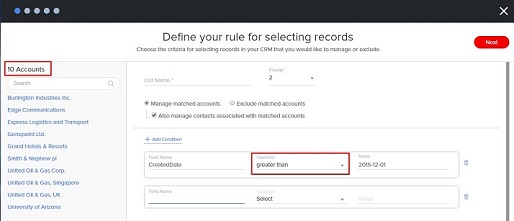
  • Select the CreatedDate field, operator as greater than and enter the date.

    5_CreatedDate_small.jpg

    This list will manage only accounts that have a CreatedDate that starts after December, 1st, 2015.

  • Select the BillingState field, operator as Not equal to, and enter the state name such as CA.

    6_-_BillingState_Filter_small.jpg

    This list will retrieve accounts from states other than CA (California).

    Note: If you add a filter criteria with a blank Value field, you must press the Enter key to add a new filter row. 

Click Next.

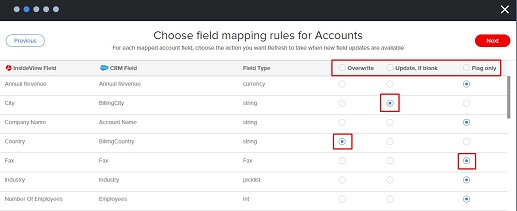
6 Map fields for your list On the Choose field mapping rules for Accounts tab, some InsideView Refresh fields will be mapped to fields in your Salesforce CRM by default, as illustrated below:  

7_-_Field_Mapping_small.jpg

You can select the Field Mapping setting for all fields by clicking any of the option at the top or choose the desired options for individual fields.

For each field, you can choose one of the following option: 

  • Overwrite – Always push field value updates automatically into your CRM, overwriting your existing values.
  • Update, if blank – Push field value updates automatically into your CRM only when the particular field is empty.
  • Flag only – Flag field value updates but does not automatically push them into your CRM. You will receive email notifications based on the frequency settings. These updates will also be visible in the Review Updates section.

Click Next. 

If you had selected manage Contacts associated to your accounts in Step 2, you will be taken to the Choose field mapping rules for Contacts screen. 

7 Set frequency On the Set the Frequency tab, select the frequency at which you want to run the list to receive updates from InsideView Refresh.      

9_-_Frequency_small.jpg

Note: InsideView Refresh will send update notifications based on the frequency settings to receive them. In addition to this email, you will receive a notification with weekly digest of updates on every Monday for each filter that you create in InsideView Refresh.

If you want to run the list immediately, select the Run now and at the scheduled date and time check box and then click Next.

 8 Finish Review the list details and click Run Now to begin processing updates immediately.

run_filter.png

Click Cancel to run InsideView Refresh list at the scheduled date and time. 

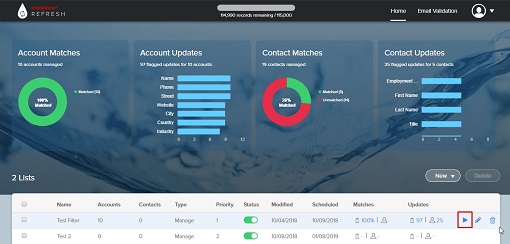
9 Review Lists You can also select any list and click the Play icon to execute it or click the edit icon to make necessary changes.

10_-_Play_Filter_small.jpg