This article outlines the Data Integrity installation process for the Microsoft Dynamics CRM Online edition.
Before you begin your installation, please ensure that pop-up blockers are turned off in your web browser.
InsideView Data Integrity is a customer data management solution that cleans, monitors, and enriches CRM data to drive revenue and operational effectiveness. You can accept or reject changes on individual records or in bulk and choose which records you want to manage, using a rules-based system with manual overrides in your Microsoft Dynamics CRM.
Existing InsideView Customers
If you have upgraded to Microsoft Dynamics 365 or simply wish to upgrade your InsideView Insights package to the newer Insights with Data Integrity package to get all the latest features, first uninstall the existing InsideView package and then install the new InsideView Insights package. There will be no change to your existing InsideView license type.
Effective April 2020, installing Insights with Data Integrity is done via the InsideView Insights webpage.
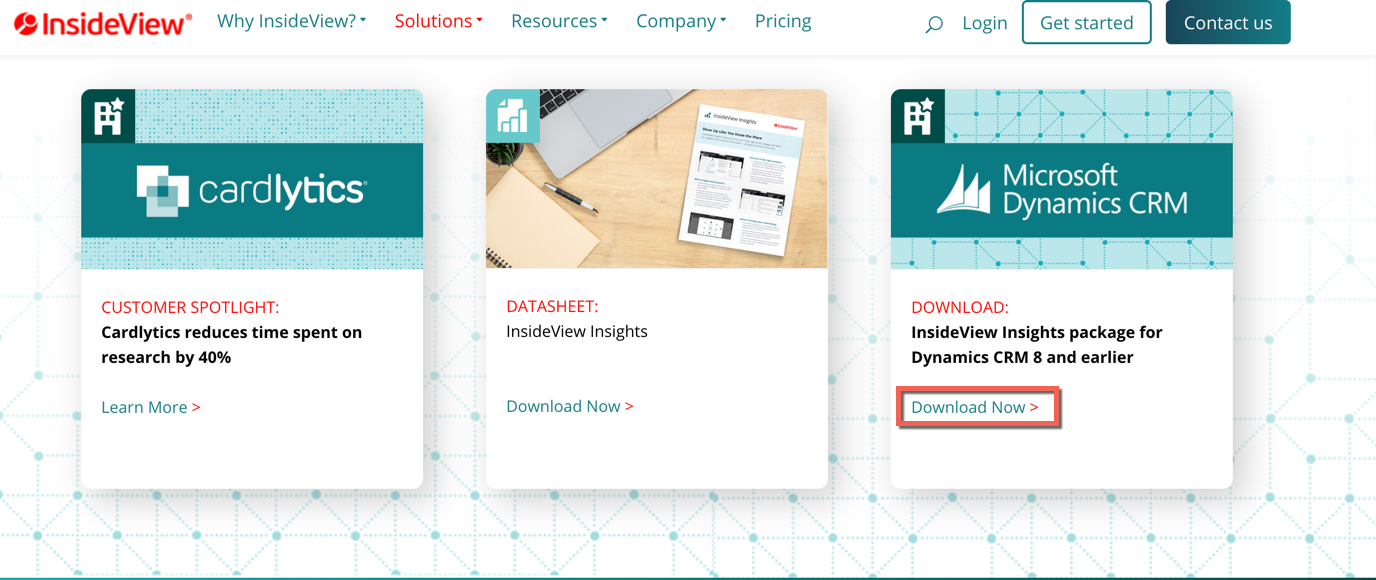
- To install Insights with Data Integrity for InsideView Insights package for Dynamics CRM 8 and earlier editions, click Download Now to download the package zip file to your local computer.
- Setup a proxy CRM user to provide your CRM users with seamless data sync/export.
Installing Insights with Data Integrity in Microsoft Dynamics CRM Online edition
You can install Insights with Data Integrity in Microsoft Dynamics CRM 2019 version and above. In order to install Insights Enterprise with Data Integrity in older versions of Microsoft Dynamics CRM, such as 2011 and 2013, it is recommended to upgrade your CRM to a newer version.
- Download the Insights with Data Integrity package from the InsideView Insights web page.

- Click the Download Now link as illustrated above.
- Log into your Microsoft Dynamics CRM as an Administrator with the “System Customizer” role.
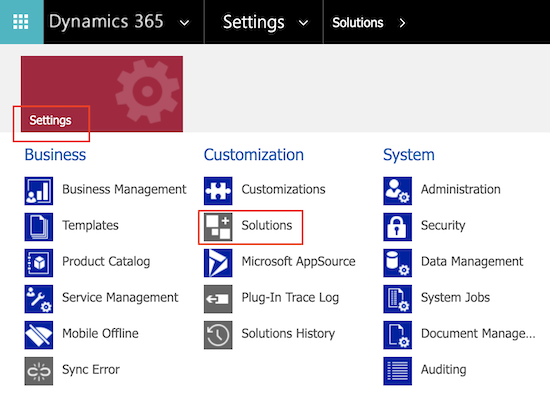
- Navigate to Settings Customizations Solutions as illustrated in the following screens:

- Click the Import icon or link and select the downloaded zip file from your local computer.

- Follow the instructions in the Installation prompts to complete your installation. Once installation completes you will see the InsideView package under Solutions.
