InsideView Refresh allows you receive updates and review matches for your Dynamics CRM account data based on filters you define.
| Step |
Description |
Details |
| 1 |
Go to the InsideView Refresh page |
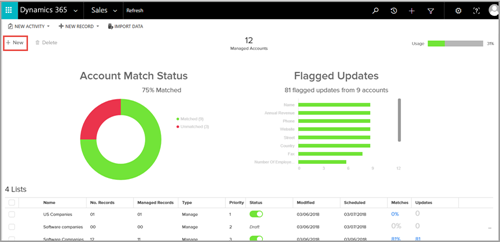
Navigate to Microsoft Dynamics CRM > Sales > Refresh or Dynamics 365 > Sales > Refresh.
 To add a new filter, click +New. To add a new filter, click +New.
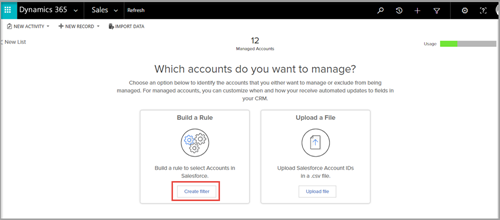
In the InsideView Refresh page, click Create Filter to add a new rule.
|
| 2 |
Define filter details |
In the Define Filter pop-up window, enter the following filter details shown:
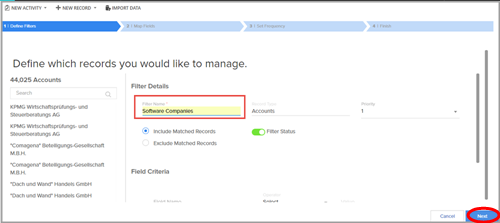
To define the parameters of your filter, enter the following filter details:
Filter Details
-
Filter Name – name of the filter
-
Record Type – the type of record. For example, Accounts.
-
Priority – Set the priority value from 1 to 5.
-
Match Records – choose either to Include or Exclude option to match data from the account.
-
Filter Status – Turn
 on or on or  off the roller to make a filter status as active or inactive. off the roller to make a filter status as active or inactive.
Filter Criteria
-
Field Name – Enter the field that you want to search account data. For example, you can enter Account Name or Account Type.
-
Operator – select an operator for the field that you want to match. For example, select equals, not equals, greater than or lesser than and so on.
-
Value – enter appropriate value for field and operator that you have selected. For example, for the name field with operator equals you can enter account name keywords in the Value field.
Click Next.
Note: You can add five filters only. Exclude filter takes the highest priority.
|
| 3 |
Map fields |
On the Field Mapping tab, by default some InsideView Refresh fields are mapped to your Dynamics CRM fields as illustrated below:
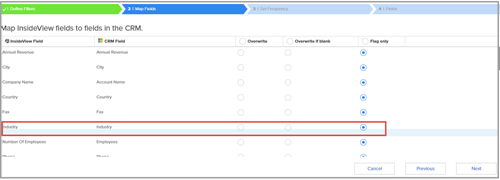
To map custom fields, select the following options:
-
Overwrite – Always push field values automatically into your CRM, overwriting your existing values.
-
Overwrite if blank – Push field values automatically into your CRM only when the particular field is empty.
-
Flag only – Send email notifications based on the frequency settings. These updates will also be visible in the Review Updates section.
Notes:
- You can choose the all the fields by clicking on top Overwrite, Overwrite if Blank or Flag Only option or choose these options for individual fields.
- If you are mapping fields for the first time, enter the field names to select a field to which you want to map a field.
Click Next.
|
| 4 |
Set Frequency |
You can configure the frequency at which you want to receive updates from InsideView Refresh.
On the Set Frequency tab, select the type as shown below:
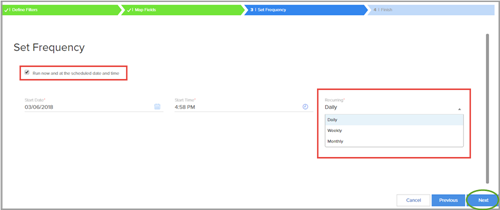
If you want to run rule immediately, select the Run now and at the scheduled date and time check box and then click Next.
Note: The Start Date and Start Time indicates that the updates will be sent to your CRM from that specified date and time on wards.
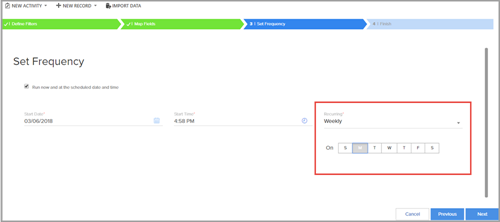
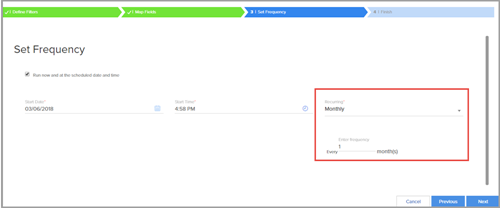
You can select the following frequency types:
-
Daily – To receive updates on a daily basis.
-
Weekly – To receive updates from InsideView Refresh on a weekly basis on a specific time as illustrated below:
-
Monthly – To receive updates on a monthly basis on specific time as shown below:
-
Click Next
|
| 5 |
Finish and run a filter |
Review the filter details and click Finish and Run to execute the filter.
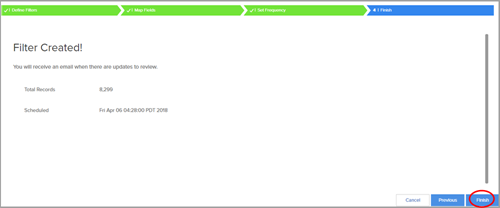
Click Finish to close the Filter page.
|
| 6 |
View the filter |
To view the filter that you have added, scroll down on the InsideView Refresh home page as shown below:
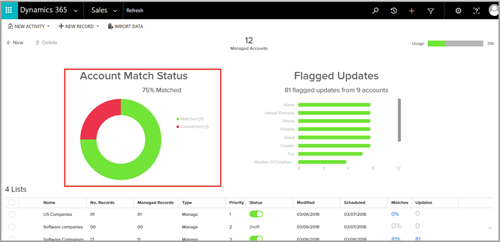
Select a filter and do any of the following actions:
- Click the Run icon to execute a filter.
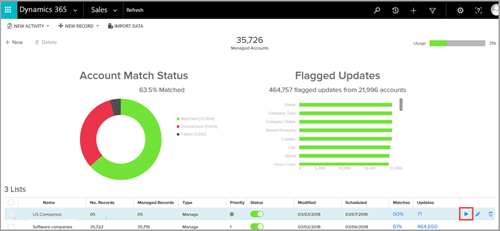
- The Run Filter pop-up appears.

- Click Yes to run the filter.
- Click the Edit icon to edit a filter.
- Click the Delete icon to delete a filter.
|
 To add a new filter, click +New.


