Installing Insideview Enrich in your Marketo automation application is an easy process. This article outlines the procedure to complete your installation.
Note: If your organization restricts network access to third party applications, please ask your IT administrator to add the following IP address ranges to allow updates from InsideView:
-
52.4.63.192 to 52.4.63.223
-
64.56.203.0 to 64.56.203.255
Sign up for InsideView Enrich
As the first step in the configuration, you’ll need to sign up as a Marketo user on the InsideView Enrich website.
| Step | Description | Details |
|---|---|---|
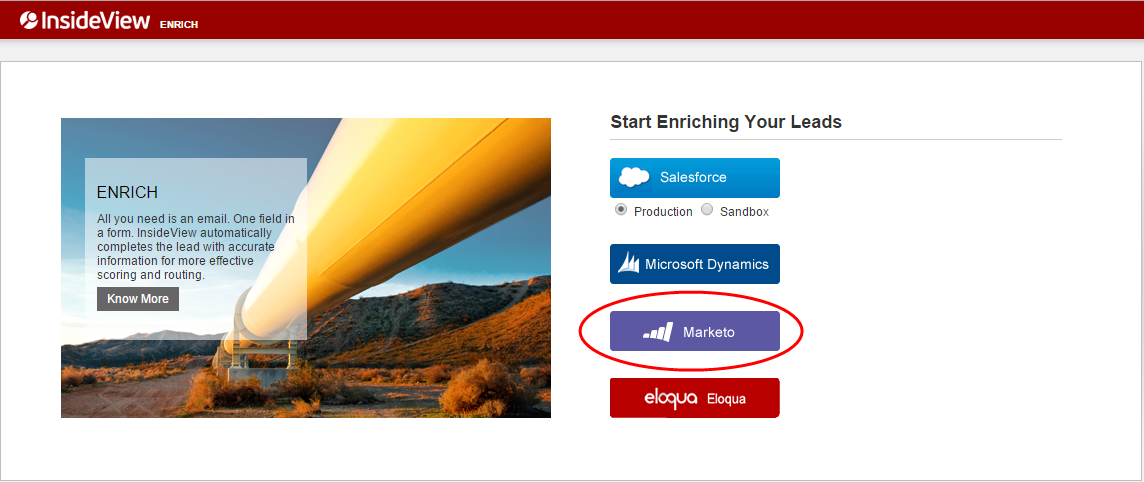
| 1 | Go to the Signup page | Go to the InsideView Enrich sign-up webpage: https://marketing.insideview.com/marketing/admin/signin. |
| 2 | Select the Marketo link | Click Marketo, and then on the pop-up window that appears click Sign up now.
|
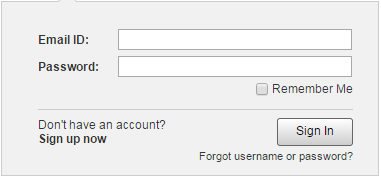
| 3 | Enter your email ID to sign up | Type the email address that you want to use for the integration in the Email ID box and click Sign Up. You’ll receive an email to the email address you have entered for confirmation.
|
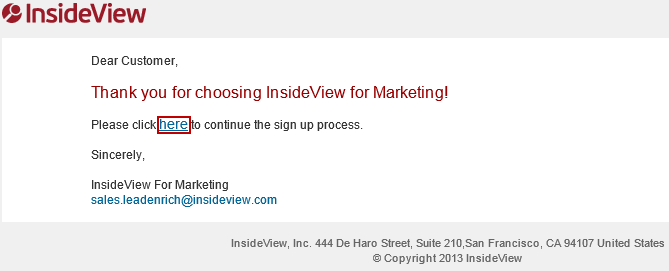
| 4 | Receive an email notification | Click the link in the email to open the sign up form. |
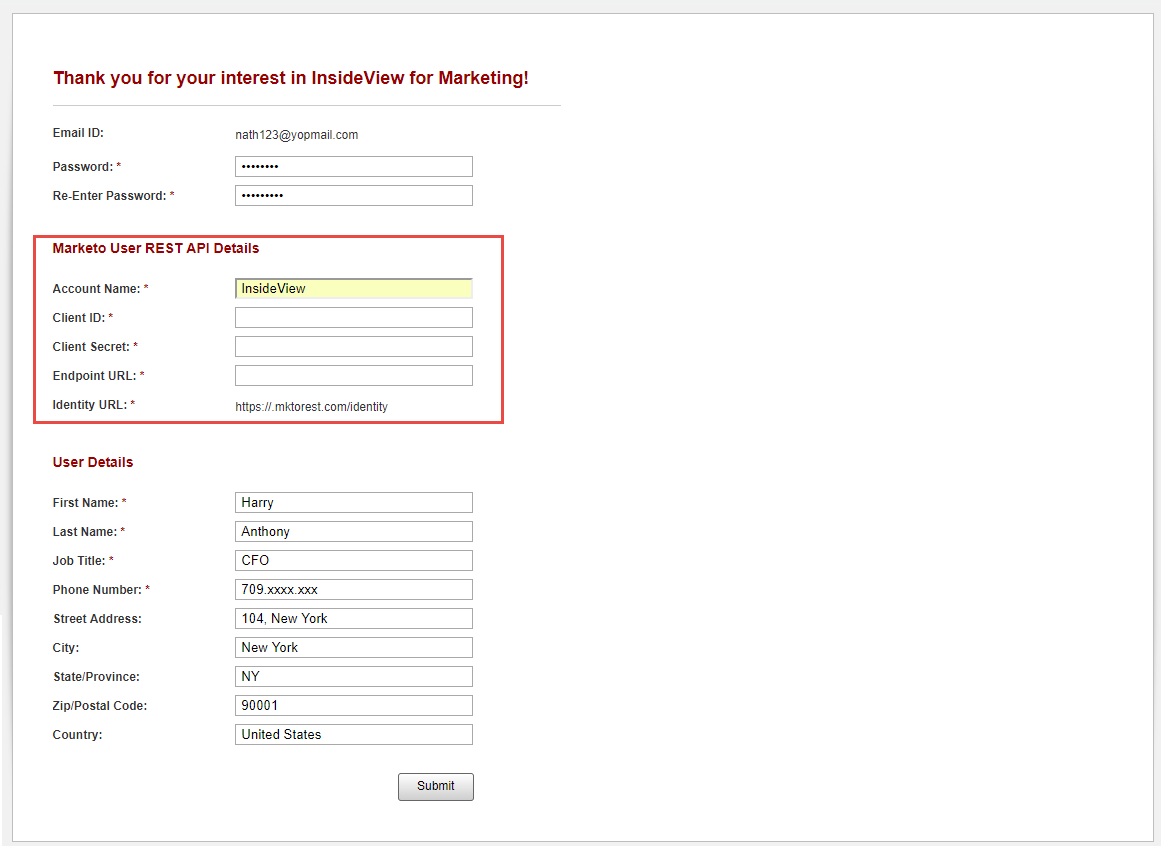
| 5 | Enter the mandatory details |
Fill data in the mandatory fields and click Submit to complete the sign up process.
|
Create Custom Fields
Create two custom fields: InsideView Match Status and InsideView Data Last Updated in Marketo to track the status of lead enrichment and the date and time at which the data on the lead was enriched.
| Step | Description | Details |
|---|---|---|
| 1 | Log in | Log in to your Marketo application with your administrative credentials. |
| 2 | Go to the Admin page | In the upper-right corner of the page, click Admin. |
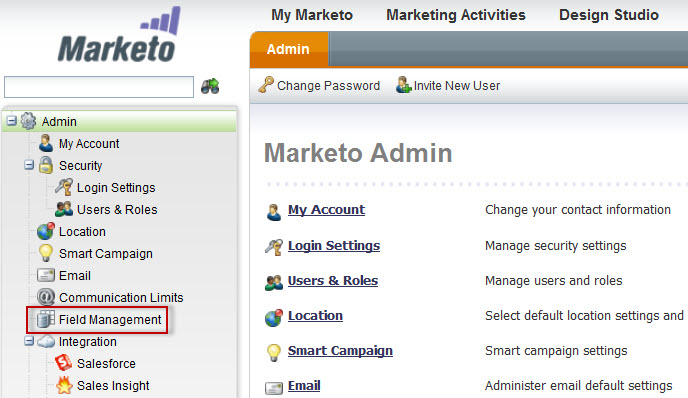
| 3 | Select the Field Management link | On the left hand side of the Admin screen, under the Admin options, click Field Management.
|
| 4 | Select the New Custom Field | On Field Management screen, click New Custom Field. |
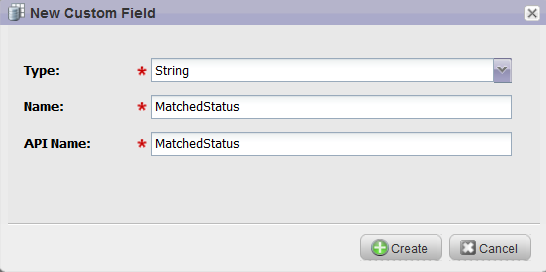
| 5 | Create custom fields | On the New Custom Field pop-up, complete the following steps depending on the field that you are creating:
To create the InsideView Match Status field:
|
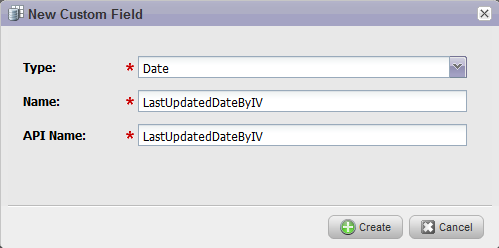
| 6 | Create the InsideView Data Last Updated | To create the InsideView Data Last Updated field:
|
Configure field mapping between InsideView Enrich and Marketo
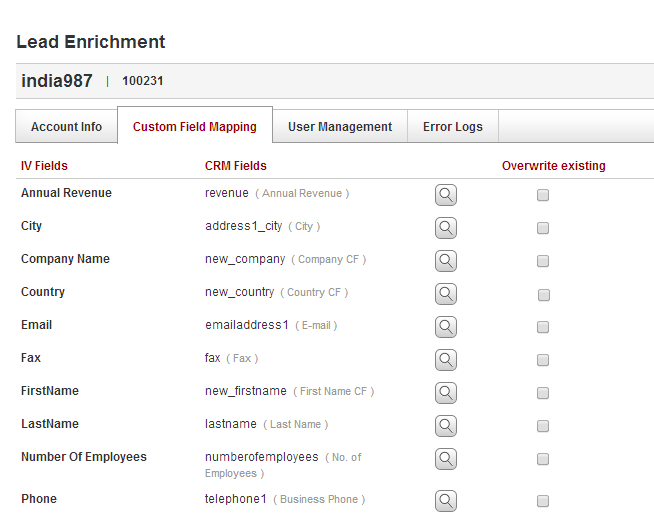
After you complete the sign up process, some standard fields in InsideView Enrich are automatically mapped to the relevant fields in Marketo. However, you can customize the auto mapping as per your requirements. You can also overwrite the data on some of the fields in your CRM records with the data in InsideView Enrich.
Follow these steps to configure the field mapping:
| Step | Description | Details |
|---|---|---|
| 1 | Go to the Sign Up page | Open the InsideView Enrich sign-up webpage: https://marketing.insideview.com/marketing/admin/signin, and then click Marketo. |
| 2 | Sign in | Sign in with your Marketo account credentials. |
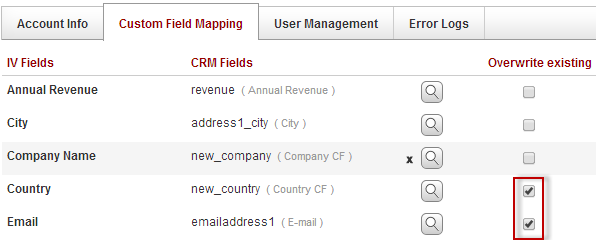
| 3 | Go to the Custom Field Mapping tab | On the InsideView Enrich dashboard, click the Custom Field Mapping tab.
|
| 4 | Modify CRM field mappings | To modify the CRM field mapped to a IV for Marketing field, click the search icon next to the CRM field. |
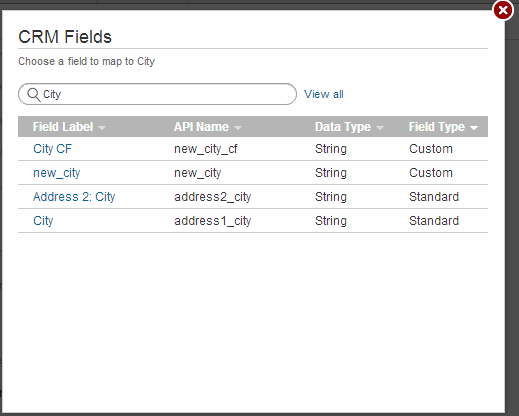
| 5 | Search for CRM fields | On the CRM Fields dialog, search for the relevant CRM fields and click the one you want to map the selected IV for Marketing field.
Note: It is advised you do this for each field to ensure a correct 1:1 mapping. There are suggestions provided for you; however, your specific instance of the field name may differ. (Optional) If you want to copy data to custom fields with null values, define a conditional field assignment workflow rule in Marketo. For more information read the article Setting Up Conditional Custom Field Assignment Rules in Marketo on our Knowledge Base. |
| 6 | Select the Overwrite Existing option | If you want IV for Marketing to overwrite the existing data in your CRM records for a particular field, click the Overwrite existing check box next to the field.
Note: The Overwrite Existing check box will work only with the default mappings. |
| 7 | Save | Scroll down the page and click Save. |
Create a Webhook for InsideView Enrich
Create a webhook in Marketo for InsideView Enrich. Webhooks let you take advantage of external web services.
Before you create a webhook, retrieve the latest email sent from InsideView with the URL to be pasted in the Webhook details. You will need to copy and paste this when setting up the Webhook.
| Step | Description | Details |
|---|---|---|
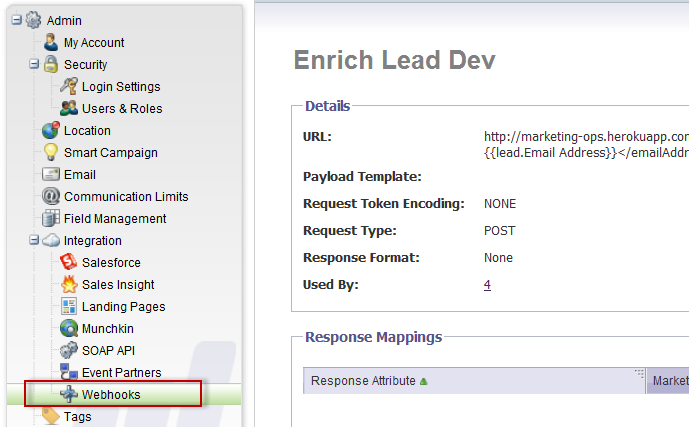
| 1 | Go to the Webhook page | On the Webhooks screen, click New Webhook.
|
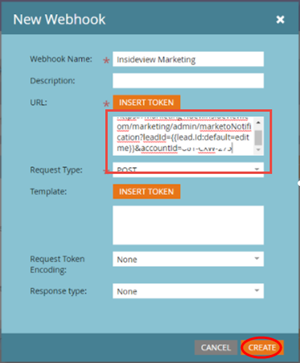
| 2 | Enter the Webhook details | On the New Webhook screen, enter the following details:
EXAMPLE: https://marketing.insideview.com/marketing/ admin/marketoNotification?leadId={{lead.Id:default=edit me}}& accountId=YOUR CRM ACCOUNT ID You can retrieve the CRM Account ID from the Marketo Endpoint URL for your organization. For more information, read the article Setting Up A REST API User and Role for InsideView Enrich in our Knowledge Base.
|
| 3 | Create | Click Create.
|
Setup the InsideView Webhook
Note how you apply the webhook depends upon your campaign setup. The InsideView webhook can applied at the global level (directions below) or to specific campaigns. The setup is conceptually the same, but we only present an explanation for applying the webhook on a global level (enriching all of your leads). Your implementation manager can advise best practices for setting up the webhook at the specific campaign level.
Create a smart campaign to invoke the InsideView Enrich webhook based on specific criteria (Smart List and Flow).
| Step | Description | Details |
|---|---|---|
| 1 | Go to the Marketing tab | Once you create a new webhook, click the Marketing Activities tab.
|
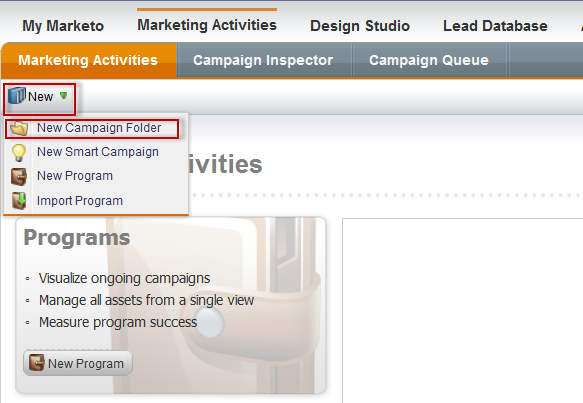
| 2 | Select the new campaign folder | Click New, and from the list of options that appear, click New Campaign Folder.
|
| 3 | Enter the new campaign details | On the New Campaign Folder pop-up, in the Name field, enter a name for the folder and click Create. The folder opens in a new tab. |
| 4 | Select the new campaign | Click New, and select New Smart Campaign. |
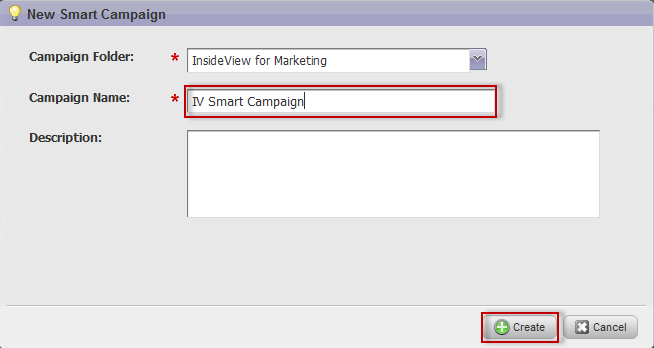
| 5 | Create | Enter a name for the campaign in the Campaign Name box, and click Create.
|
Create a Smart List and Flow Step
Create a smart list and a flow step within the smart campaign to send every new lead to InsideView Enrich for enrichment. You can customize your smart list to enrich leads only with the valid company domain and specific lead sources.
| Step | Description | Details |
|---|---|---|
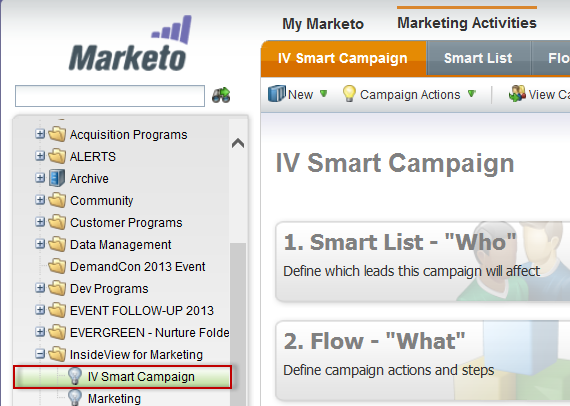
| 1 | Select the New Campaign | On the left hand side of the Marketing Activities screen, click the name of the campaign to open it.
|
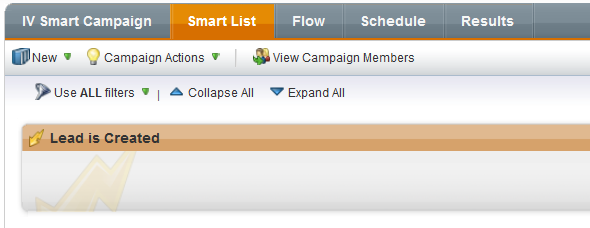
| 2 | Go the Smart List tab | Click the Smart List tab.
|
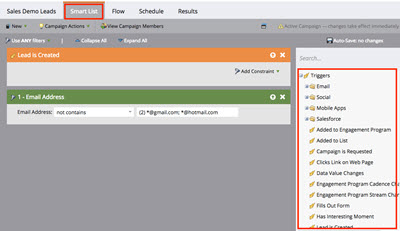
| 3 | Drag the lead trigger | On the Smart List, drag the Lead is Created trigger.
To learn how to enrich existing leads, read the article Creating a Batch and Trigger Campaigns to Enrich Existing Leads in Marketo Integration in our Knowledge Base. |
| 4 | Customize the smart list |
To exclude the generic email domain from being enriched, click Add Constraint. On the Add Constraint pop-up, select Email Address item and choose not contains from the drop-down menu and enter *@gmail.com; *@hotmail.com and other generic email domain as shown below:
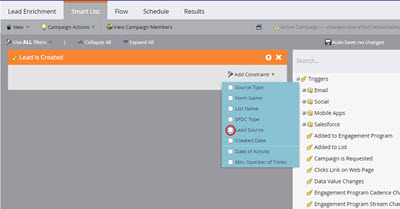
This filter will enrich only those leads whose email addresses has a proper company domain and will not enrich leads with generic email addresses as listed above. Note: Marketo allows you add multiple filters with different set of rules. If you want to enrich leads only from a particular source, add a filter where the lead source is equal to the desired source (for example, select web) as shown below:
The lead source is filter created as illustrated below:
|
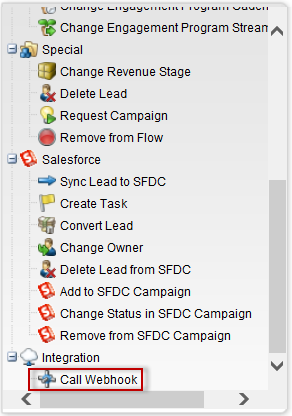
| 4 | Drag the call webhook | Next, click the Flow tab.
Drag Call Webhook from the list on the right hand side of the screen.
|
| 5 | Select the Webhook |
Click the Webhooks drop-down and select the webhook you create for InsideView Enrich. (Optional) If you want to copy data to custom fields with null values, define a conditional field assignment workflow rule in Marketo. For more information read the article Setting Up Conditional Custom Field Assignment Rules in Marketo on our Knowledge Base. |
Activate the Campaign
Once you complete the previous steps, activate the campaign. InsideView Enrich automatically enriches all the leads that are created in your Marketo account from now.
| Step | Description | Details |
|---|---|---|
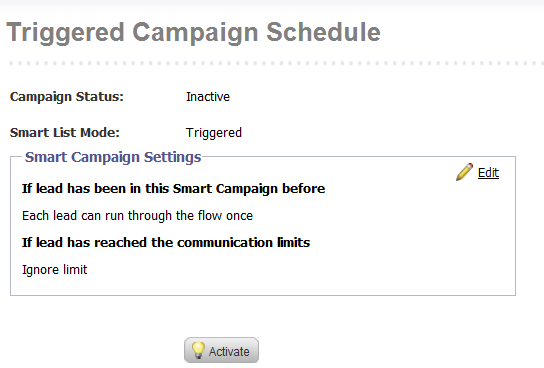
| 1 | Go to the Schedule tab | Once you set up the Smart List and the Flow step, click the Schedule tab. |
| 2 | Activate | Click Activate.
|
| 3 | Confirm the activation | On the Activate Triggered Campaign pop-up, click Activate to confirm the activation. |
