Once you have added the Demandbase app to each object in Salesforce, do the following to complete your installation. This article provides steps for:
- Configuring the Demandbase Search Component in Salesforce Lightning Edition
- Configuring the Demandbase Search Component in Salesforce Classic Edition
Configuring the Demandbase Search Component in Salesforce Lightning Edition
| Step | Description | Details |
|---|---|---|
| 1 | Go to the Home Page | Navigate to the Homepage where you would like to add the Demandbase Search and Demandbase Opportunity Alerts component. |
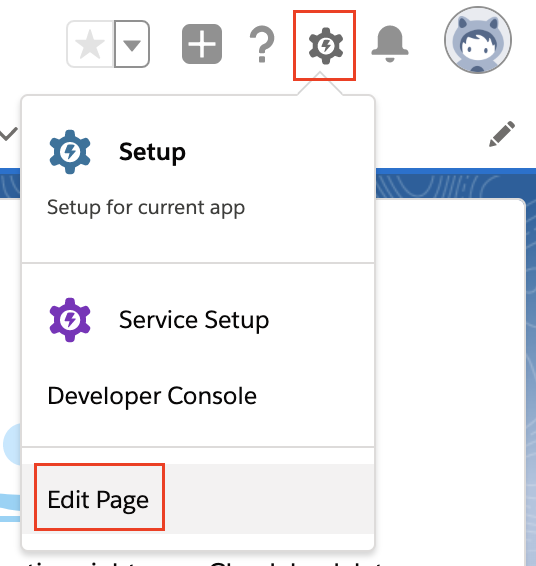
| 2 | Edit the Home Page | Go to Setup on the top right-hand corner and click Edit Page. |
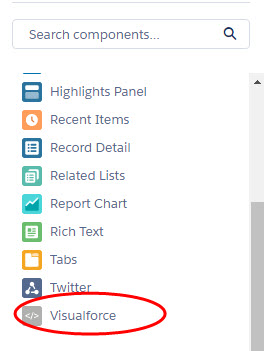
| 3 | Add the Search Demandbase Component | In the resultant screen, scroll down on the left pane to click Visualforce as illustrated:
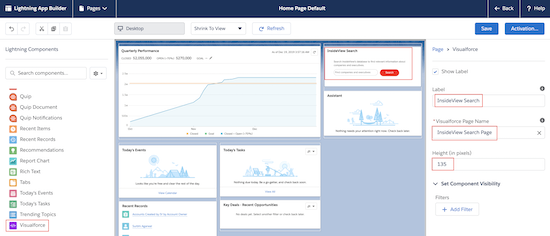
Drag and drop the Visualforce component to the desired location where you would like to configure the Demandbase Search component. In this screen, enter the values for fields highlighted in red to complete the configuration process:
|
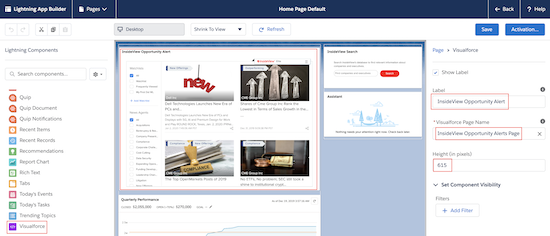
| 4 | Add Opportunity Alerts | (Optional) Drag and drop a Visualforce component to the desired location where you would like to configure the Demandbase Opportunities Alert Page component.
In this screen, enter the values for fields highlighted in red to complete the configuration process:
|
| 5 | Save | Click Save. |
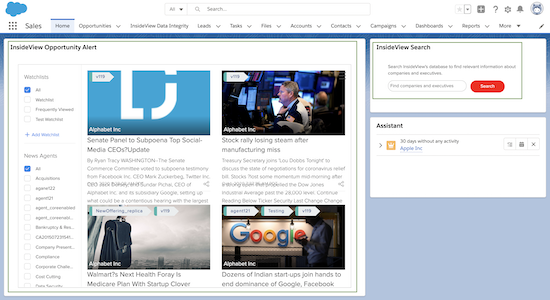
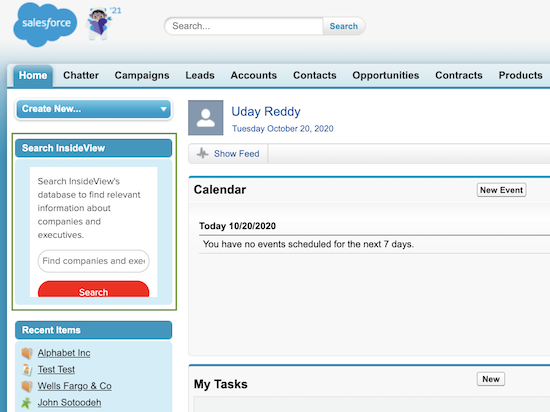
| 6 | View Demandbase Search on the Home page | The InsideView Search and InsideView Opportunity Alerts component are added to the home page as illustrated: |
