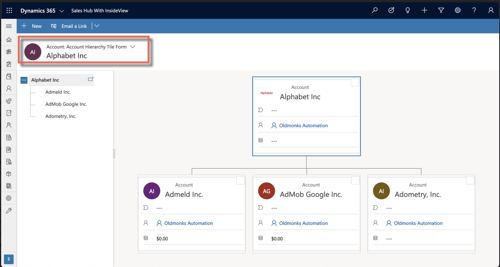
Microsoft Dynamics CRM allows customers to create account hierarchies (i.e. family tree relationships of a company) to give customers a more complete picture of their customers and prospects. InsideView Data Integrity provides comprehensive company data including a unique identifier that enables automatic account linking in Microsoft Dynamics CRM.
By automatically creating and updating account hierarchies in Microsoft Dynamics CRM to mirror InsideView’s family tree data, you can ensure that you always have the most up-to-date and complete company hierarchies in your CRM, enabling your revenue teams to better understand customers and prospects and grow relationships.
Account Hierarchies Setup Pre-requisites
Before enabling the Account Hierarchy workflows, complete the following prerequisites:
- Install the latest InsideView package in the Microsoft Dynamics CRM instance. For more information, read the article Installing InsideView Data Integrity in Microsoft Dynamics CRM Online editions in our Knowledge Base. The following fields in Microsoft Dynamics CRM are used for Account Hierarchies, which are created as part of InsideView package installation:
- Account and Lead Entity
- Insideview Company ID
- Insideview Parent ID
- Insideview Ultimate Parent ID
- Complete an Integration setup in InsideView Unified Portal to establish a communication channel between InsideView Data Integrity and Microsoft Dynamics CRM. For more information, read the article Setting Up an Application User and Configuring InsideView Data Integrity in Microsoft Dynamics CRM in our Knowledge Base.
Note: These fields will NOT be available in the Field Mapping screen but can be synced to CRM.
To enable the Account Hierarchies feature, follow these instructions:
| Step | Description | Details |
|---|---|---|
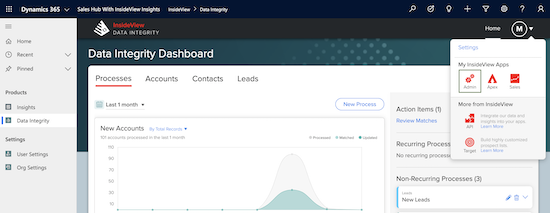
| 1 | Go to the Unified Portal | In the Data Integrity Dashboard, click the Profile Dropdown at the top and select Admin item to open Admin Portal as illustrated:
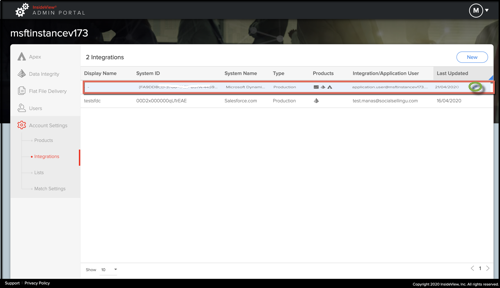
Note: You can go to the Data Integrity settings and select the Integrations tab. In the Account Settings page, click the Integrations tab. Then hover over the integration for which you want to enable the Account Hierarchies feature and click the Edit icon.
|
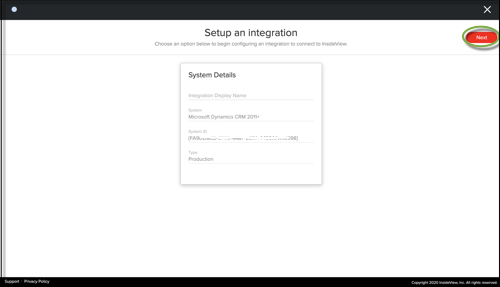
| 2 | Go to the Account Hierarchy setup | In the Integration Setup page, review the Integration details and click Next.
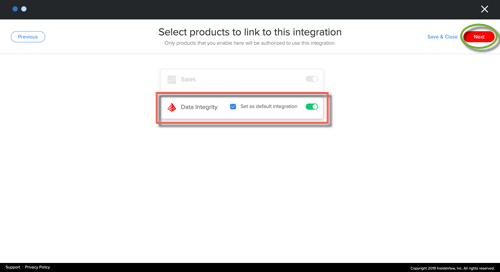
In the Integration Setup workflow pages, make sure that Data Integrity is enabled as illustrated:
Review your integration user and field mappings for Accounts, Contacts and Leads then click Next to open the Automate account and lead linkages setup page. |
| 3 | Enable the Account Hierarchies feature | In the Automate account and lead linkages page, you can do the following:
|
| 4 | View family tree in Microsoft Dynamics CRM | Once Account Hierarchies is enabled, log in to your Microsoft Dynamics CRM and go to any Account Details page and select the Account Hierarchy tab as illustrated:
Note: Account hierarchies are created only for those accounts that are managed by InsideView Data Integrity. Now, Microsoft Dynamics account hierarchies will be mirrored InsideView’s family tree data in your CRM without any manual effort by your end-users or operations team, making it easier to find related companies and grow relationships. |
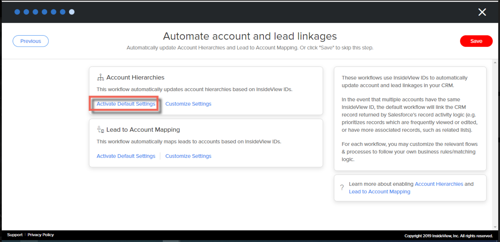
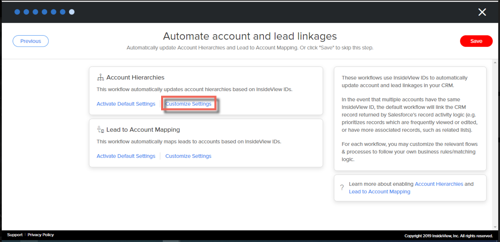
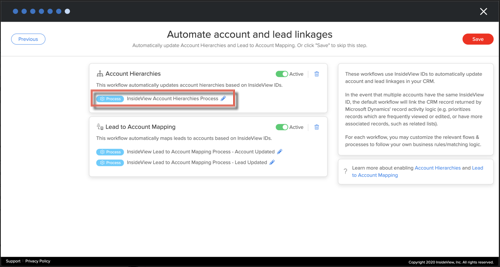
 to redirect to the process in Microsoft Dynamics CRM, where you can edit Account Hierarchies workflows based your business process requirements.