InsideView Data Integrity includes native Salesforce workflows that can be used to “activate” InsideView data throughout your lead-to-revenue cycle. You can automate lead-to-account mapping to allow you to better route leads by the account owner, track account-level engagement, and measure overall account Based Marketing (ABM) effectiveness.
The Lead to Account mapping feature helps marketers identify which leads belong to which accounts, fueling their ABM campaigns.
Configure Related Lists for Leads in the Salesforce Account Page Layouts
When you install the latest AppExchange package, it creates an iv__Account__c custom field on the Lead object that is used to search the Account object. InsideView Data Integrity automatically populates this custom field to let you view if the relationship exists from a Lead to a matching Account.
Important Note:
If you want to process more than 200,000 records as part of a query using InsideView Data Integrity, then Lead to Account Mapping flow might not be able to execute successfully. This is due to a SOQL query limitation, and the Salesforce CRM will likely return an error.
Workaround: You can contact the Salesforce.com support team and share with them the following SOQL queries:
- SELECT Id, iv__InsideView_Company_ID__c FROM Lead where iv__InsideView_Company_ID__c = 10322153(use any IV ID that exists in CRM)
- SELECT Id, iv__InsideView_Company_ID__c FROM Account where iv__InsideView_Company_ID__c = 10322153 (use any IV ID that exists in CRM) limit 1
Ask the Salesforce support team to "index" two fields. The InsideView Company ID field on the lead and account record should be indexed.
To configure the related lists for Leads in the Salesforce account page layouts, follow these steps:
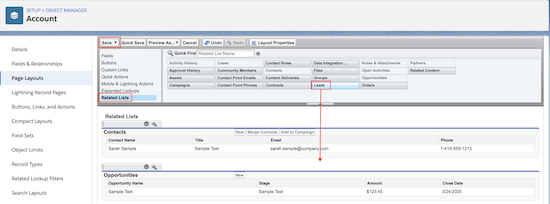
You must add Related Lists for Leads to your Account Page layout so that CRM users are able to view all leads that are mapped to an account.
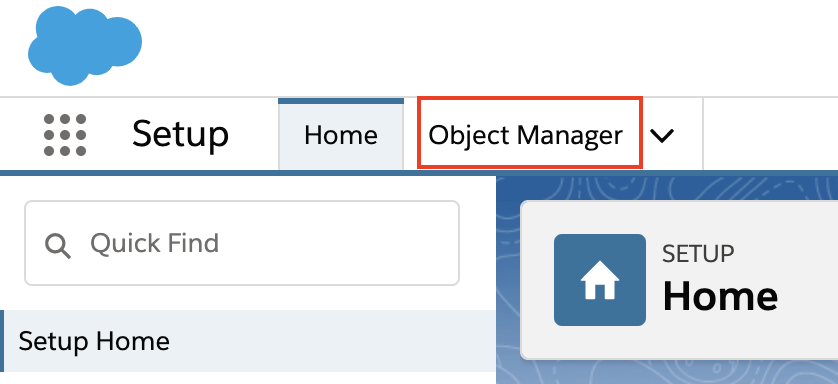
- Go to Setup and click on Object Manager.
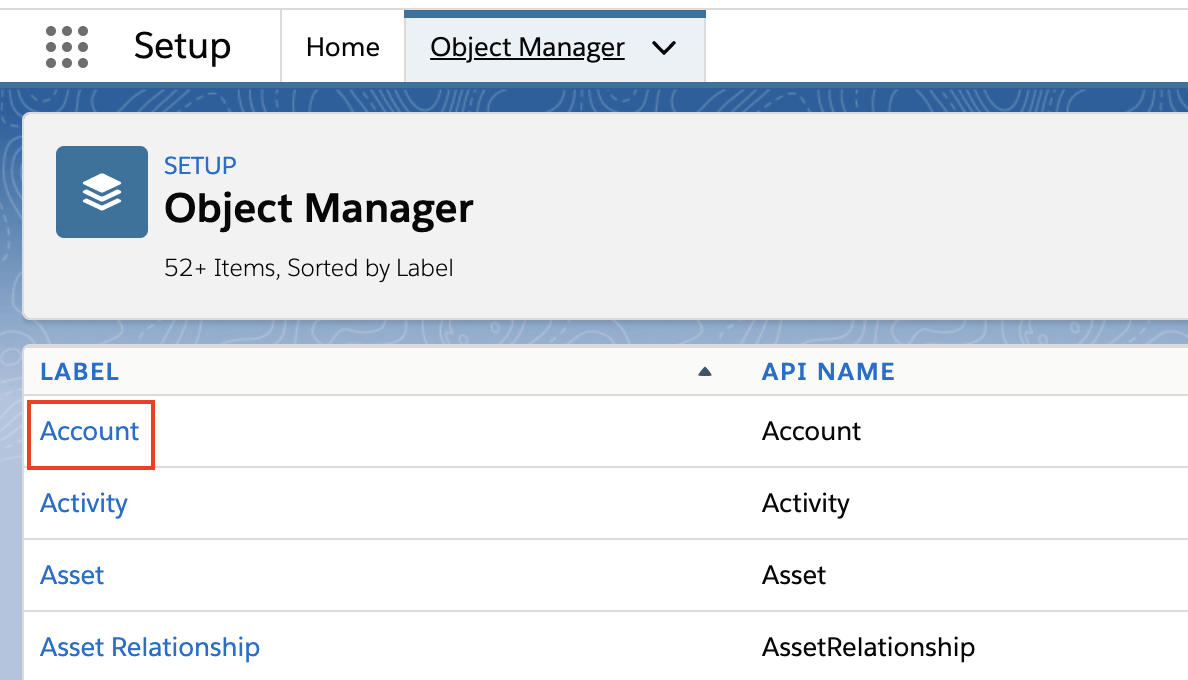
- Search and select the Account object.
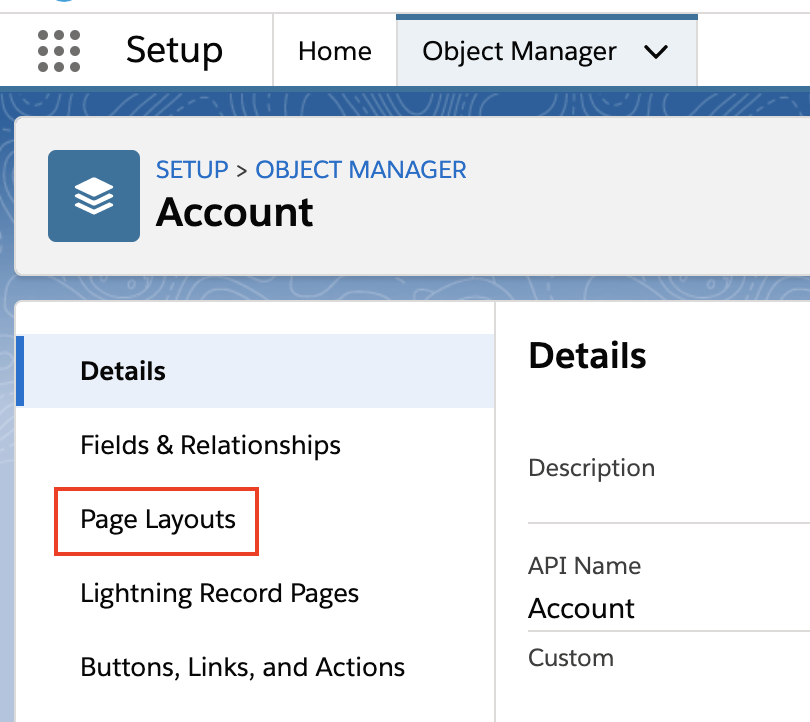
- Click Page Layouts.
- Select the Account Layout that you wish to update.
- Select the Related Lists item, search and add Leads to the page layout, then click Save.
Lead to Account Mapping Pre-requisites
Before enabling the Lead to Account Mapping workflows, complete the following prerequisites:
- Complete an Integration setup in InsideView Admin Portal to establish a communication channel between InsideView and Salesforce CRM. For more information, read article Setting Up an Integration for Salesforce CRM in Data Integrity in our Knowledge Base.
- Install the latest InsideView package in Salesforce CRM instance. For more information, read the article Installing InsideView in Salesforce CRM in our Knowledge Base. This package installation will create the following fields in Salesforce CRM:
- Executive ID
- Employment ID
Note: These fields will NOT be available in the Field Mapping screen but can be synced to CRM.
To enable the Lead to Account mapping, follow these instructions:
| Step | Description | Details |
|---|---|---|
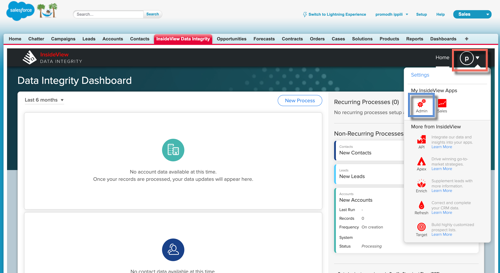
| 1 | Go to the Unified Portal | In the Data Integrity Dashboard, click the Profile Dropdown at the top and select Admin item to open Admin Portal as illustrated:
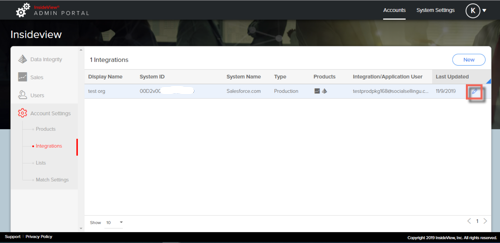
In the Account Settings page, click the Integration tab. Then hover over the integration for which you want to enable the Account Hierarchies feature and click the Edit icon.
|
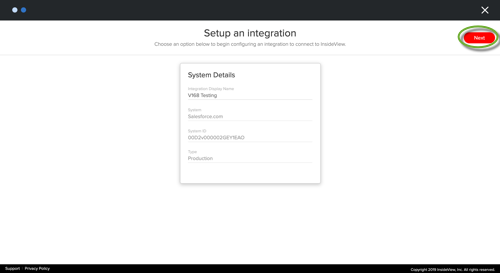
| 2 | Go to the lead to account mapping setup | In the Integration Setup page, review the Integration details and click Next.
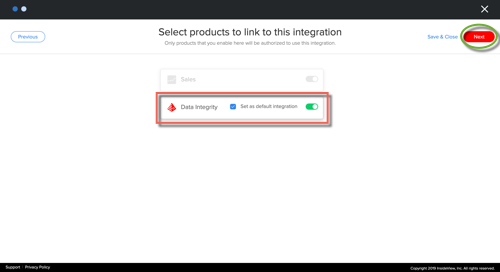
In the Integration Setup workflow pages, make sure that Data Integrity is enabled as illustrated:
Review your integration user and field mappings for Accounts, Contacts and Leads then click Next to open the Automate account and lead linkages setup page. |
| 3 | Enable the Lead to the Account Mapping feature | In the Automate account and lead linkages page, you can do the following:
|
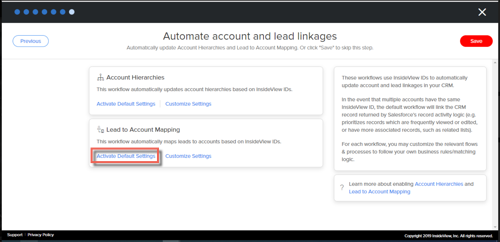
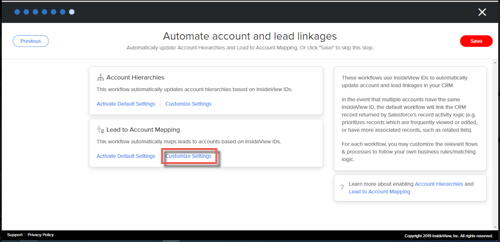
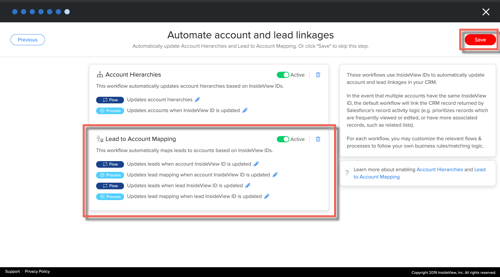
 edit the Lead to Account Mapping workflows based on your business process requirements in Salesforce CRM.