InsideView Data Integrity includes native Microsoft Dynamics CRM workflows that can be used to “sync” InsideView data throughout your lead-to-revenue cycle. You can automate lead-to-account mapping to allow you to better route leads by the account owner, track account-level engagement, and measure overall marketing campaign's effectiveness.
The Lead to Account mapping feature helps marketers identify which leads belong to which accounts, fueling their marketing campaigns.
Lead to Account Mapping Pre-requisites
Before enabling the Lead to Account Mapping workflows, complete the following prerequisites:
- Install the latest InsideView package in the Microsoft Dynamics CRM instance. For more information, read the article Installing InsideView Data Integrity in Microsoft Dynamics CRM Online editions in our Knowledge Base. Following fields in Microsoft Dynamics CRM are used for Lead to Account mapping, which is created as part of InsideView package installation:
- Executive ID
- Employment ID
Note: These fields will NOT be available in the Field Mapping screen but can be synced to CRM.
- Complete an Integration setup in InsideView Admin Portal to establish a communication channel between InsideView and Microsoft Dynamics CRM. For more information, read the article Setting Up an Application User and Configuring InsideView Data Integrity in Microsoft Dynamics CRM in our Knowledge Base.
To enable the Lead to Account mapping, follow these instructions:
| Step | Description | Details |
|---|---|---|
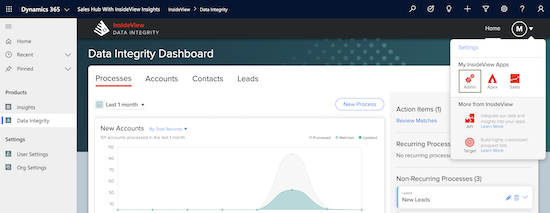
| 1 | Go to the Unified Portal | In the Data Integrity Dashboard, click the Profile Dropdown at the top and select Admin item to open Admin Portal as illustrated:
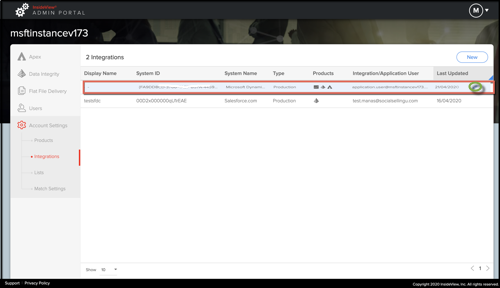
Note: You can go to the Data Integrity settings and select the Integrations tab. In the Account Settings page, click the Integration tab. Then hover over the integration for which you want to enable the Account Hierarchies feature and click the Edit icon.
|
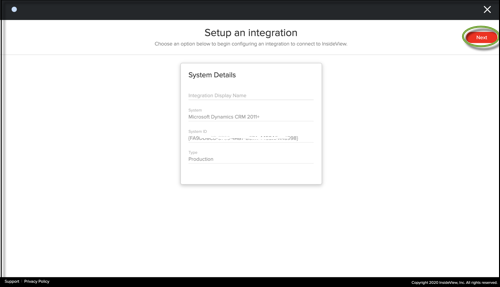
| 2 | Go to the lead to account mapping setup | In the Integration Setup page, review the Integration details and click Next.
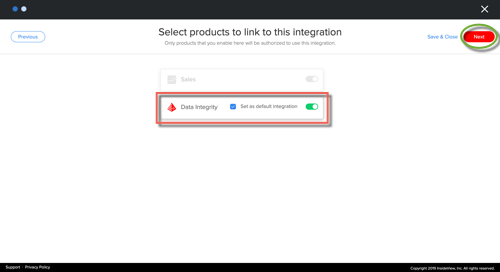
In the Integration Setup workflow pages, make sure that Data Integrity is enabled as illustrated:
Review your integration user and field mappings for Accounts, Contacts and Leads then click Next to open the Automate account and lead linkages setup page. |
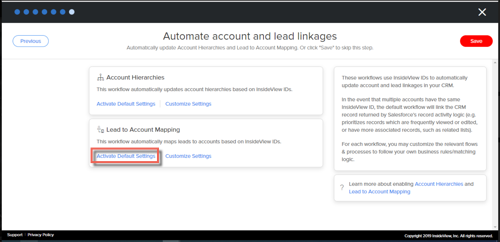
| 3 | Enable the Lead to Account Mapping feature | In the Automate account and lead linkages page, you can do the following:
Note: Lead to Account mappings are created only for leads managed by InsideView Data Integrity. |
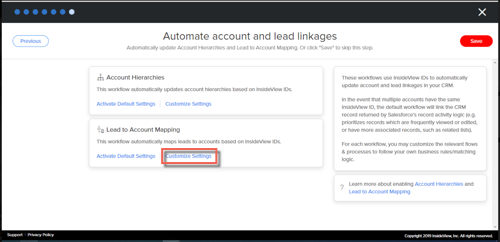
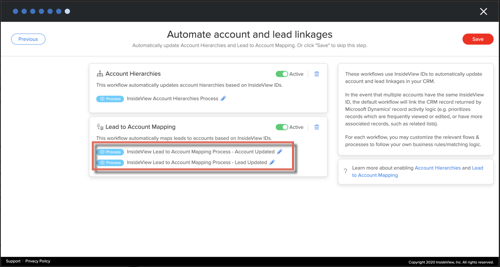
 to redirect to the workflow in Microsoft Dynamics CRM, where you can edit the Lead to Account Mapping workflows based on your business process requirements.