This KB article provides instructions to configure Data Integrity field mappings in Salesforce and Microsoft Dynamics CRMs.
InsideView automatically maps default fields which you can sync into your CRM. For example, fields like company revenue, employee count, contact name, job title and so on.
System administrators can edit InsideView Data Integrity's default field mappings and create a custom field mappings for the CRM fields to import data from InsideView into their CRM.
Note: All mapped fields for respective objects are populated in the Data Integrity update stare and compare screen. InsideView Data Integrity uses the Integration account/application users permissions and does not consider the user permissions.
To configure field mappings for your organization, follow these steps:
| Step | Description | Details |
|---|---|---|
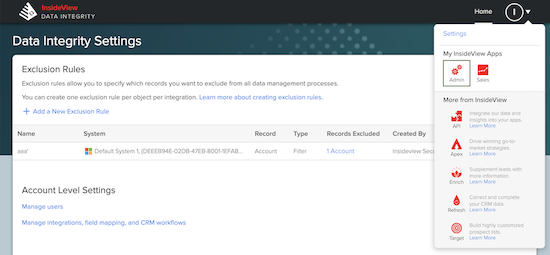
| 1 | Go to the Unified Portal | In the Data Integrity Dashboard, click the Profile drop-down at the top and select Admin to open Unified Admin Portal as illustrated:
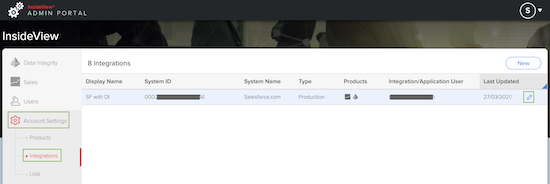
Go to Account Settings, click the Integrations tab. Then hover over the integration for which you want to edit field mappings and click the Edit icon.
|
| 2 | Go to Field Mapping | The integration setup wizard opens. Click Next to skip and proceed to the Field Mapping. |
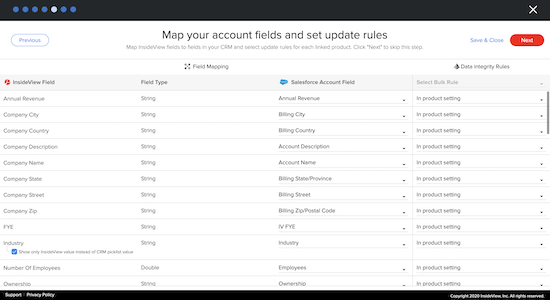
| 3 | Map the desired Fields into the Custom Field | The Map Fields page displays all InsideView fields available under Accounts, Contacts, and Leads.
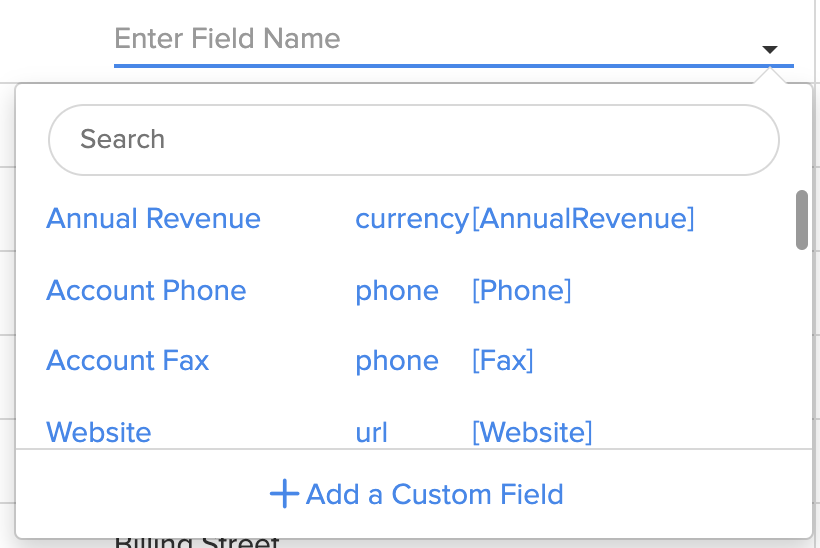
Click the Account Field against the relevant InsideView field that you want to map to your CRM custom field. In the CRM Fields prompt, browse through the list of fields or search by name.
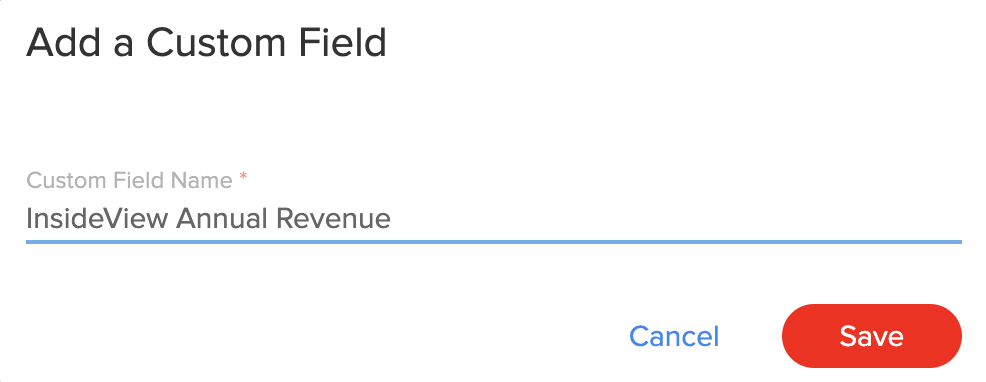
If you would like to create a custom field, click Add a Custom Field. Enter the custom field name and click Save.
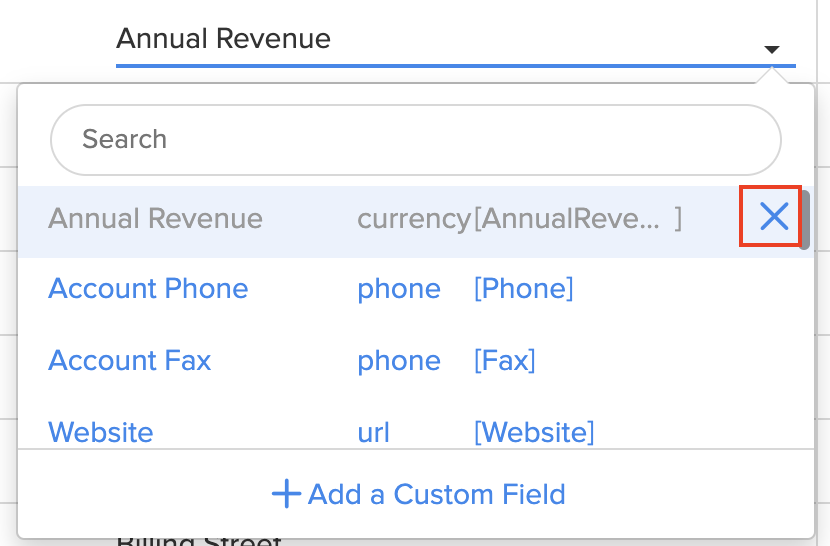
To remove an existing field mapping, hover over the selected CRM field and click the X icon as illustrated:
To get a complete list of fields available for mapping please read InsideView Data Integrity Fields and Datatype Mappings article in our Knowledge Base. |
| 4 | Choose the Data Integrity update rules | Choose how you would like to manage the Data Integrity updates.
You can select the following options:
Note: You can set any option (Overwrite, Update, if blank, or Flag Only) for all fields by selecting the option at the top. The option selected will be common for all fields. Click Next to proceed with Contact and Lead field mapping. |
| 5 |
Save the Field Mapping |
Once you have mapped all required fields from CRM to InsideView fields, click Save. |
