This article provides instructions to create a static and custom rules-based email validation process for contacts and leads in InsideView Data Integrity in Salesforce CRM integration.
A Data Integrity administrator can follow these steps to launch InsideView Data Integrity and create a new email validation process:
- Creating a static email validation process
- Creating an email validation process with custom rules
- Creating an email validation process using existing data management options
Note: You create only THREE email validation processes in an account.
Creating a static email validation process
Before creating a data management process, make sure you have configured an Integration for Data Integrity. For information, read the article Setting up InsideView Data Integrity in Salesforce CRM in our Knowledge Base.
| Step | Description | Details |
|---|---|---|
| 1 | Log in to Salesforce CRM | Log in to Salesforce CRM Login with your admin user credentials. |
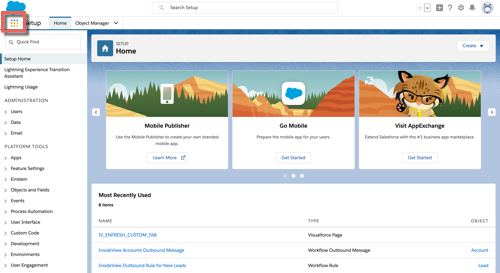
| 2 | Go to the Sales app | In the Salesforce CRM home page, click the App Launcher link.
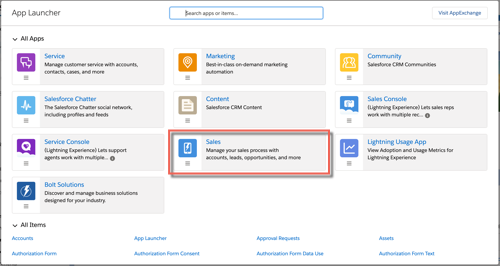
In the App Launcher window, click the Sales app. |
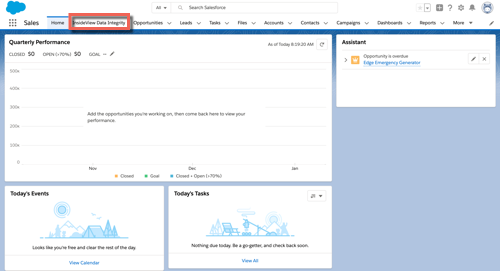
| 3 | Go to the Data Integrity app | In the Salesforce home page, select the InsideView Data Integrity tab.
|
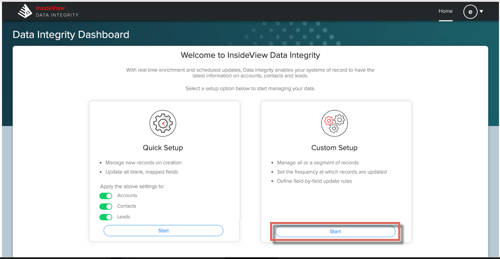
| 4 | Create an email validation process | If you are configuring any process for the first time after your Data Integrity account is provisioned, the following screen appears:
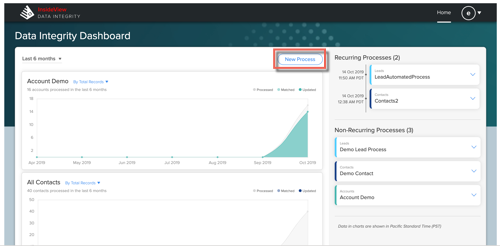
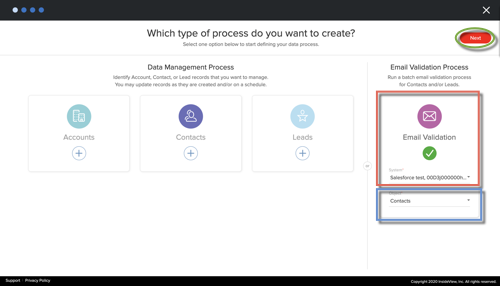
If you want to create a process for each object separately, click Start in the Custom Setup card. If you have already created processes, click New Process to launch the process creation workflow page. Select the Email Validation link then select the Salesforce instance in the System and Contacts/Leads in the Object field.
Click Next. |
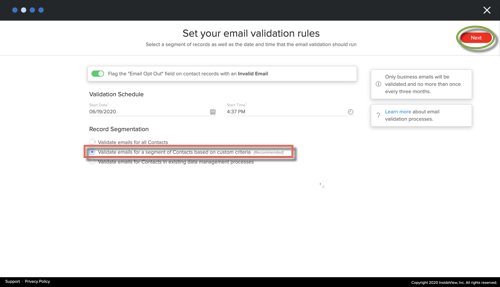
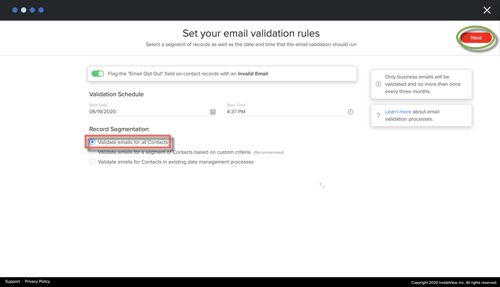
| 5 | Select the segmentation and frequency | Next, you can do the following actions:
InsideView Data Integrity allows you to add criteria only for active contacts and leads.
In this example, select the Validate emails for all contacts in record segmentation and then click Next. |
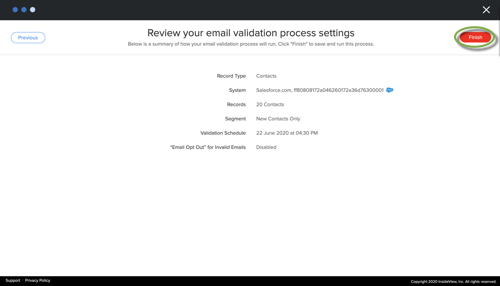
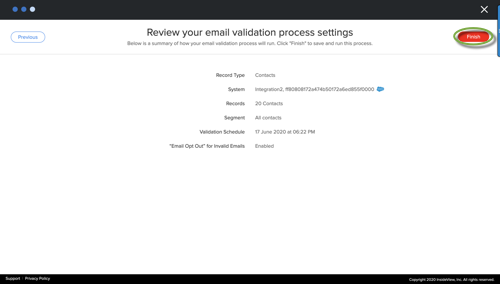
| 6 | Review and complete process | On the Review your email validation process settings page, you can review settings that you selected in the wizard and click Finish to save the email validation process.
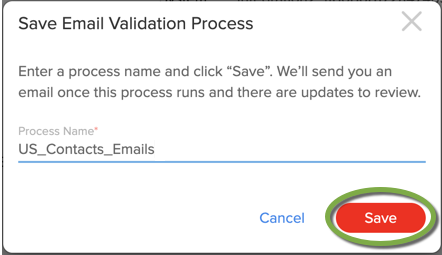
In the Save Email Validation Process dialog, enter the name for your process, and click Save.
|
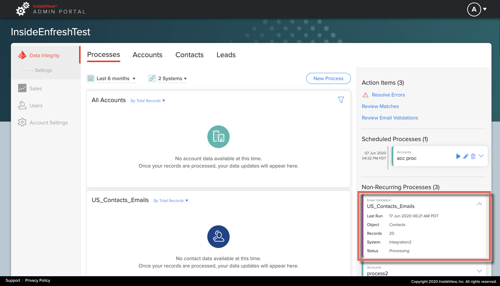
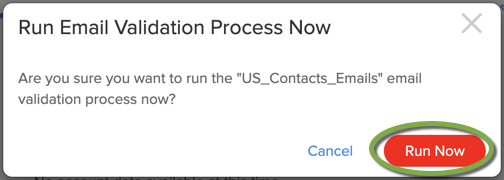
| 7 | View and Run Process | Once you have created an email validation process, you can run, edit, or delete the email validation process.
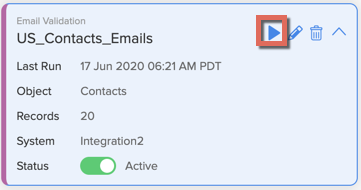
Click the
Hover over any one of the processes to access the following actions:
|
Note: Follow the same instructions to create an email validation process for LEADS by selecting the lead object.
Creating an email validation process with custom rules
Before creating a data management process, make sure you have configured an Integration for Data Integrity. For information, read the article Setting up InsideView Data Integrity in Salesforce CRM in our Knowledge Base.
| Step | Description | Details |
|---|---|---|
| 1 | Log in to Salesforce CRM | Log in to Salesforce CRM Login with your admin user credentials. |
| 2 | Go to the Sales app | In the Salesforce CRM home page, click the App Launcher link.
In the App Launcher window, click the Sales app. |
| 3 | Go to the Data Integrity app | In the Salesforce home page, select the InsideView Data Integrity tab.
|
| 4 | Create an email validation process | If you are configuring any process for the first time after your Data Integrity account is provisioned, the following screen appears:
Note: If you want to create a process for each object separately, click Start in the Custom Setup card. If you have already created a process, click New Process to launch the process creation workflow page. Select the Email Validation link then select the Salesforce instance in the System and Contacts/Leads in the Object field.
|
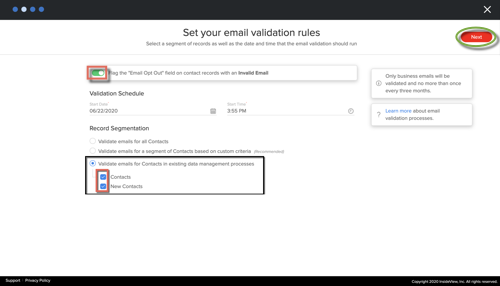
| 5 | Select the segmentation and frequency | Next, you can do the following actions:
InsideView Data Integrity allows you to add criteria only for active contacts and leads.
|
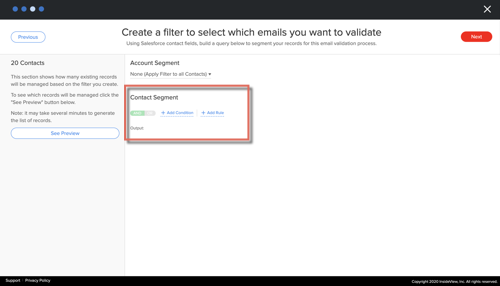
| 6 | Define custom criteria | If the Create a filter to select which email you want to validate page, the Contacts Segment area appears:
You can define custom criteria to validate a segment of contact emails by clicking either +Add Condition or +Add Rule.
|
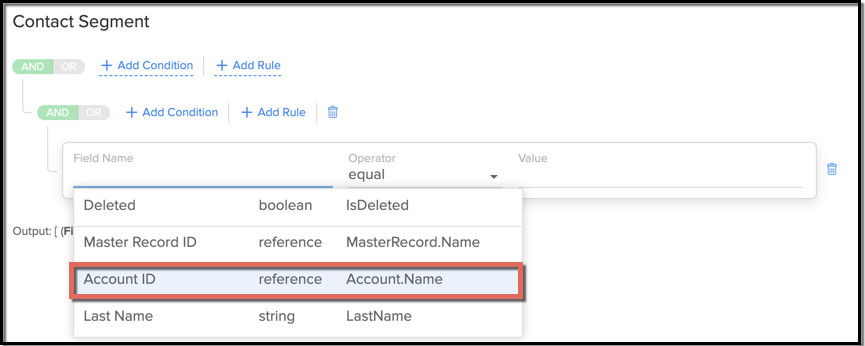
| 7 | Add a condition | When you click + Add Condition, enter the following details to define the condition:
Use Case Examples Here are a few use case examples of filters, showing the different fields used in Salesforce CRM with an operator and a sample value:
|
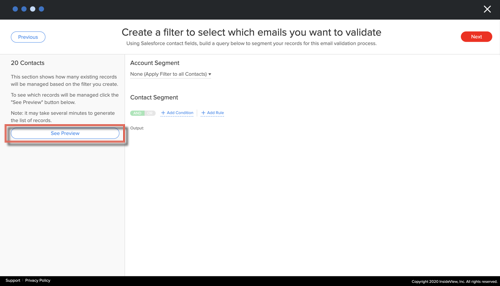
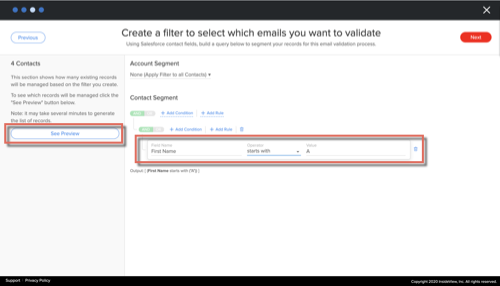
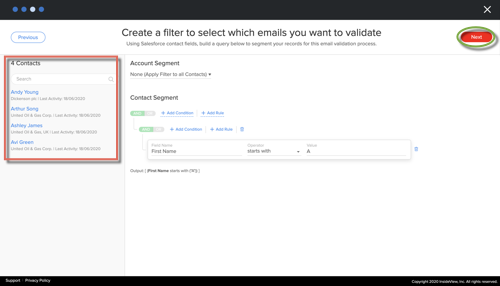
| 8 | Preview the email validation process | Click See Preview to view which contacts are being captured by your dynamic query as illustrated:
Click Next. |
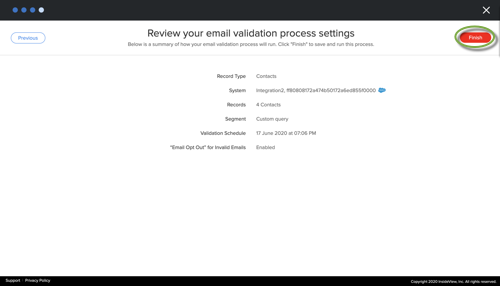
| 9 | Review and complete process | On the Review your email validation process settings page, you can review settings that you selected in the wizard and click Finish to save the email validation process.
In the Save Email Validation Process dialog, enter the name for your process, and click Save.
|
| 10 | View and Run Process | Once you have created an email validation process, you can run, edit or delete the email validation process.
Click the
Hover over any one of the processes to access the following actions:
|
Note: Follow the same instructions to create an email validation process with custom rules for LEADS by selecting the lead object.
Creating an email validation process using existing data management options
Before creating a data management process, make sure you have configured an Integration for Data Integrity. For information, read the article Setting up InsideView Data Integrity in Salesforce CRM in our Knowledge Base.
Note: You can validate email for contacts only if an existing data management process is created before.
| Step | Description | Details |
|---|---|---|
| 1 | Log in to Salesforce CRM | Log in to Salesforce CRM Login with your admin user credentials. |
| 2 | Go to the Sales app | In the Salesforce CRM home page, click the App Launcher link.
In the App Launcher window, click the Sales app. |
| 3 | Go to the Data Integrity app | In the Salesforce home page, select the InsideView Data Integrity tab.
|
| 4 | Create an email validation process | If you are configuring any process for the first time after your Data Integrity account is provisioned, the following screen appears:
Note: If you want to create a process for each object separately, click Start in the Custom Setup card. If you have already created a process, click New Process to launch the process creation workflow page. Select the Email Validation link then select the Salesforce instance in the System and Contacts/Leads in the Object field.
|
| 5 | Select the segmentation and frequency | Next, you can do the following actions:
InsideView Data Integrity allows you to add criteria only for active contacts and leads.
In this example, select the Validate emails for contacts in the existing data management process in record segmentation and then click Next. |
| 6 | Review and complete process | On the Review your email validation process settings page, you can review settings that you selected in the wizard and click Finish to save the email validation process.
In the Save Email Validation Process dialog, enter the name for your process, and click Save.
|
| 7 | View and Run Process | Once you have created an email validation process, you can run, edit, or delete the email validation process.
Click the
Hover over any one of the processes to access the following actions:
|
Note: Follow the same instructions to create an email validation process for LEADS by selecting the lead object.

 icon to expand the process that you just created.
 icon to immediately run the process.
 icon to edit the process. For more information, read the article
  icon to delete the process.