Follow these steps to launch Data Integrity and create a new account management process:
| Step | Description | Details |
|---|---|---|
| 1 | Log in to Microsoft Dynamics CRM | Log in to Microsoft Login with your admin user credentials. |
| 2 | Go to the Saleshub app |
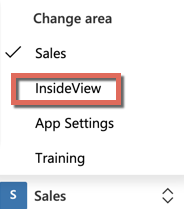
In the Microsoft Dynamics CRM page, select the SalesHub with InsideView Insights app and click Sales link, then select the InsideView item as illustrated:
|
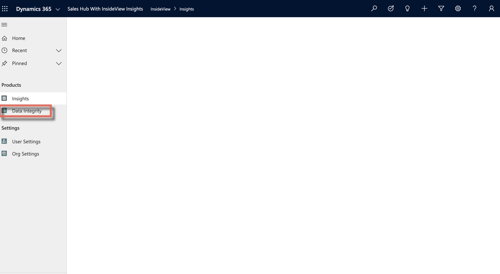
| 3 | Go to the Data Integrity app | In the App Launcher window, select the Data Integrity app.
|
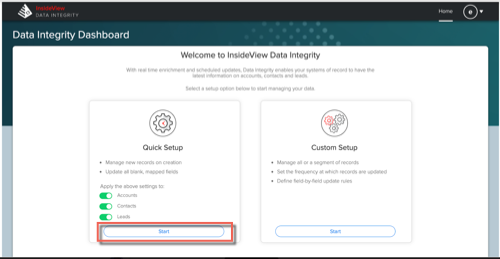
| 4 | Create an account management process | If you are configuring any process for the first time after your Data Integrity account is provisioned, the following screen appears:
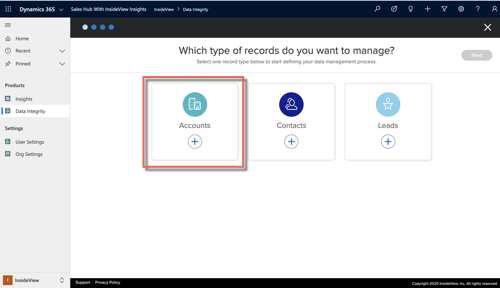
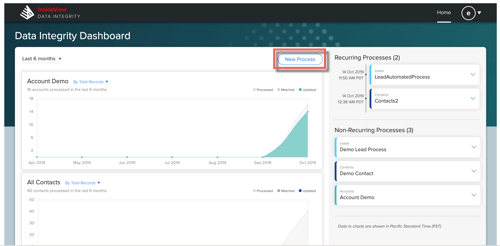
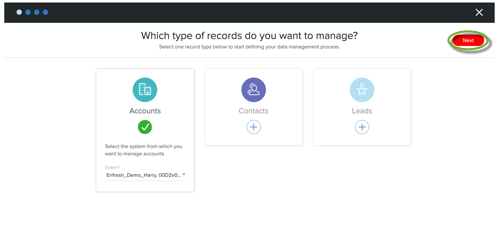
Note: Before creating a data management process, make sure you have configured an Integration for Data Integrity. For information, read the article Setting Up an Integration for Data Integrity in Microsoft Dynamics CRM Online in our Knowledge Base. In the Quick Setup card, click Start to create a new process for Accounts, Contacts and Leads. Note: If you want to create a process for each object separately, click Start in the Custom Setup card. Select the Accounts link. If you have already created a process, click New Process to launch the process creation workflow page. Select the Accounts link and click Next to create a new account management process. Note: Data Integrity allows you to add criteria only for active accounts. |
| 5 | Select the segmentation and frequency |
Choose one of the following options:
In the Update Frequency area, select the frequency at which you want to run the account management process to receive updates from Data Integrity. You can select the following frequency options:
Note: Data Integrity will send update notifications based on these frequency settings to receive them. |
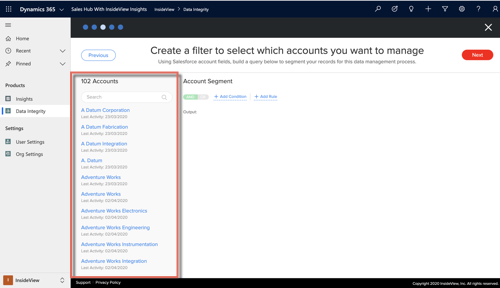
| 6 | Preview the account management process | Click See Preview to view accounts that are managed already in Microsoft Dynamics CRM as illustrated:
For more information about creating a custom rule-based filter for managing accounts, read the article Creating an Account Management Process with Custom Rules in Microsoft Dynamics CRM in our Knowledge Base. |
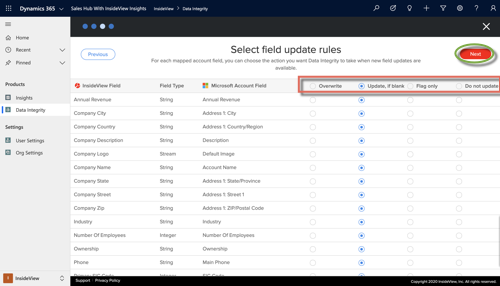
| 7 | Select the account field update rule | On the Select field update rules page, you will see which Demandbase fields are mapped to fields in your CRM, as illustrated:
You can select the update rules for all fields by clicking any of the options at the top of the table or set field-by-field update rules. For each field, you can choose one of the following options:
|
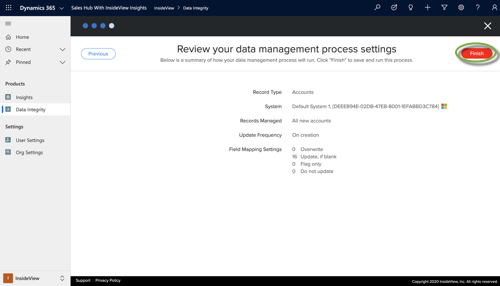
| 8 | Review and complete process | On the Review your data management process settings page, you can review your account management process settings and click Finish.
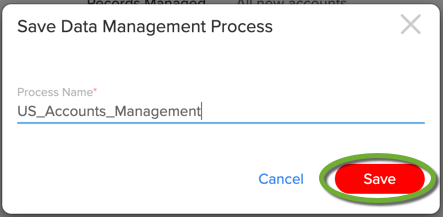
In the Save Data Management Process dialog, enter the name for your process and click Save.
|
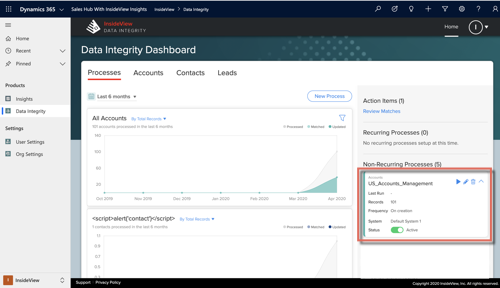
| 9 | View and Run Process | Once you have created an account process, you can run, edit or delete the account process.
Click the
Hover over any one of the processes to access the following actions:
|
 icon to expand the process that you just created.
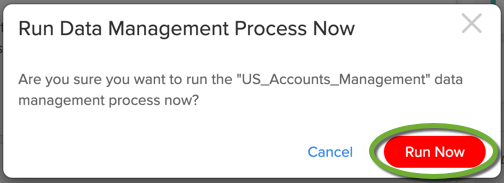
 icon to immediately run the process and then in the Run Data Management Process Now dialog, click Run Now.
 icon to edit the process. For more information, read the article
  icon to delete the process.