This article provides instructions to set up Demandbase as an external data source for Salesforce federated search.
Note: The federated search feature is supported only in Salesforce’s Lightning edition. It is available for Salesforce Enterprise, Professional, Unlimited, and Developer licenses.
Prerequisites
In order to use federated search, a custom domain must be configured in your Salesforce instance. If the custom domain exists, go to the Configuring Federated Search section below.
To set up a custom domain for your Salesforce instance, follow these steps:
| Step | Description | Details |
|---|---|---|
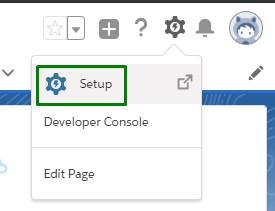
| 1 | Go to Setup | Log in to Salesforce with admin user credentials and click Setup as shown below:
|
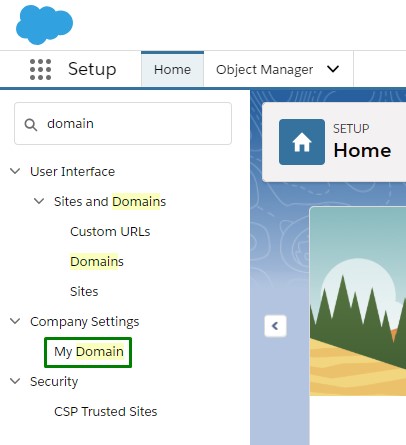
| 2 | Go to My Domain page | Enter domain in the search box and select My Domain option under Company Settings.
|
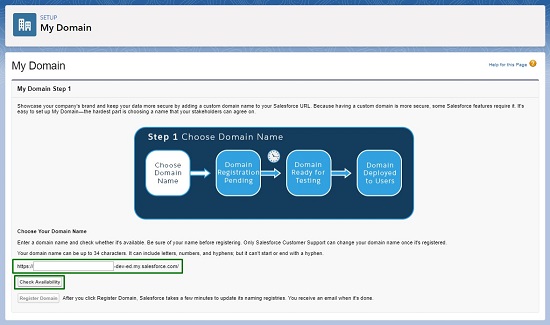
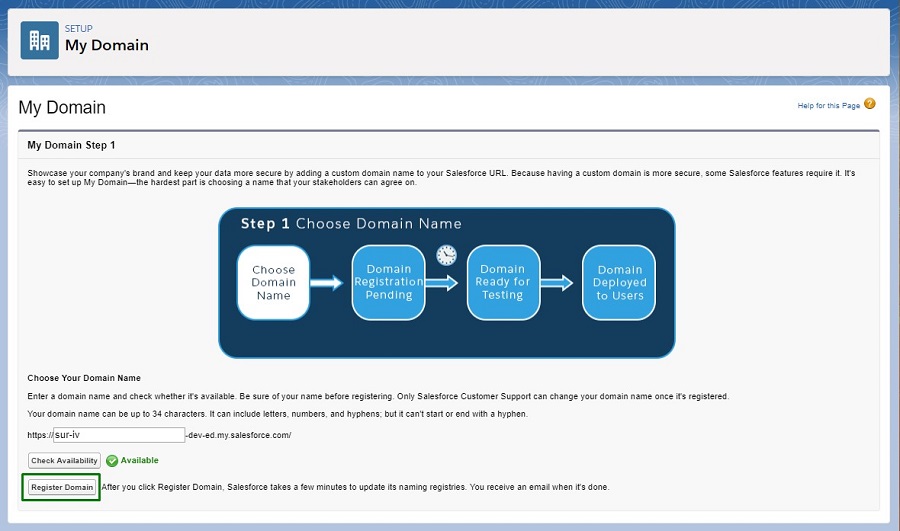
| 3 | Register your domain | In the My Domain page, enter your preferred domain name and click Check Availability.
Once you enter the desired domain name, click Register Domain.
Note: Custom domain registration might take some time. Refresh the page to view progress. |
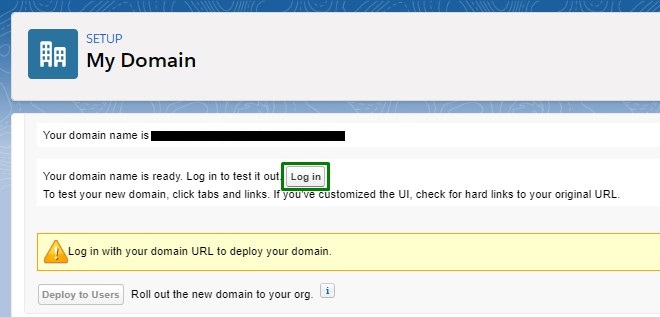
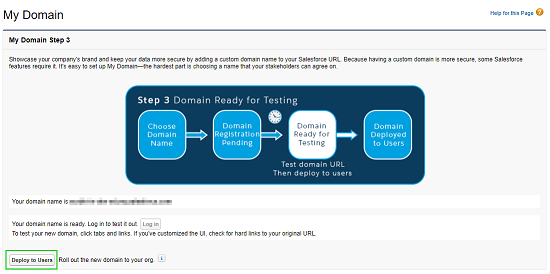
| 4 | Deploy the custom domain | Once your domain is registered, click Log in to deploy your domain.
After you log in, the My Domain page opens. Click Deploy to Users to make the custom domain available for all users.
|
Configuring Federated Search
Once you have configured a custom domain, follow these steps to install the Demandbase Unified package and configure federated search.
| Step | Description | Details |
|---|---|---|
| 1 | Install the Demandbase package |
To install Demandbase Unified package, follow the instructions in the Installing Demandbase in Salesforce CRM article in our Knowledge Base. |
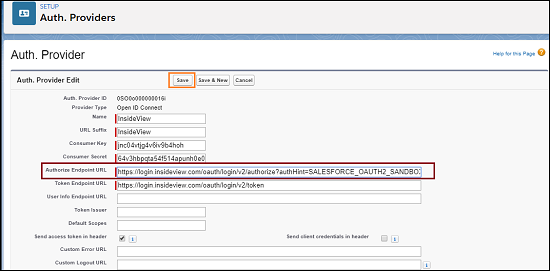
| 2 | Configure authentication URL for Sandbox | If you are setting up Federated Search in a Salesforce Sandbox instance, follow these steps to configure the authentication URL:
Note: If you are setting up Demandbase Federated Search on a Production environment, this step is not needed. |
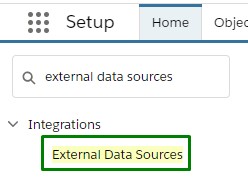
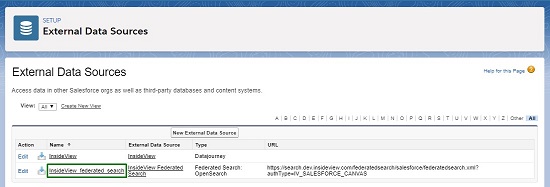
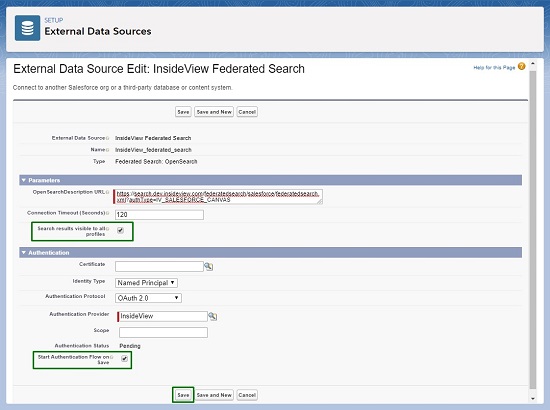
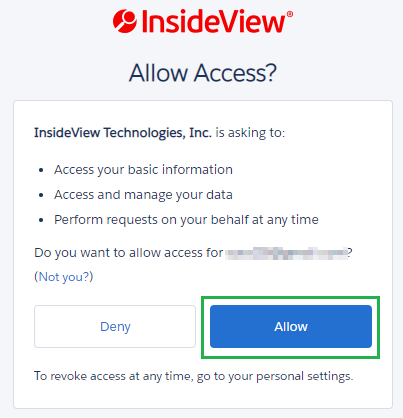
| 3 | Authenticate the External Data Source | To authenticate Demandbase External Data Source, follow these steps:
|
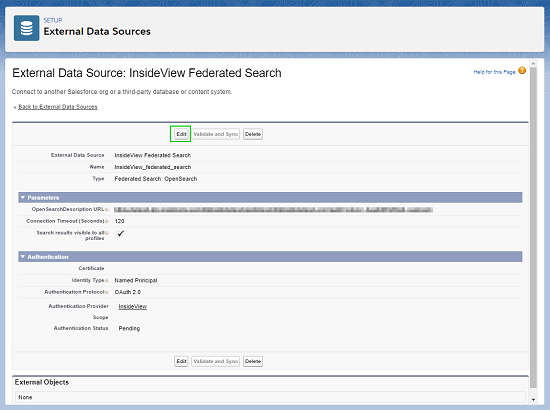
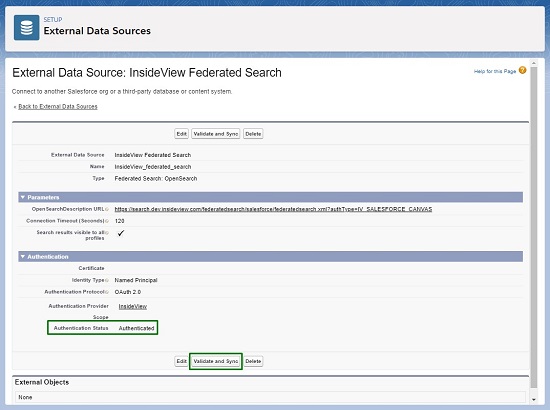
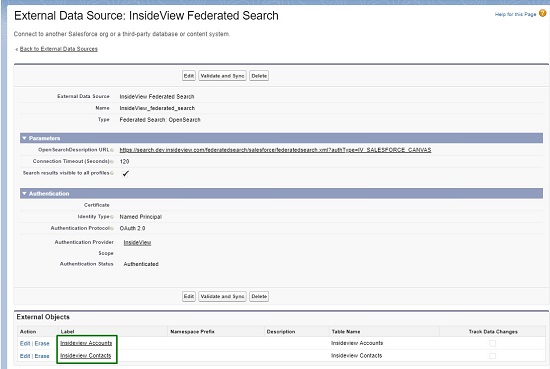
| 4 | Validate and Sync | Once the authentication process is completed, the External Data Source page opens. Verify that the Authentication Status has changed to Authenticated.
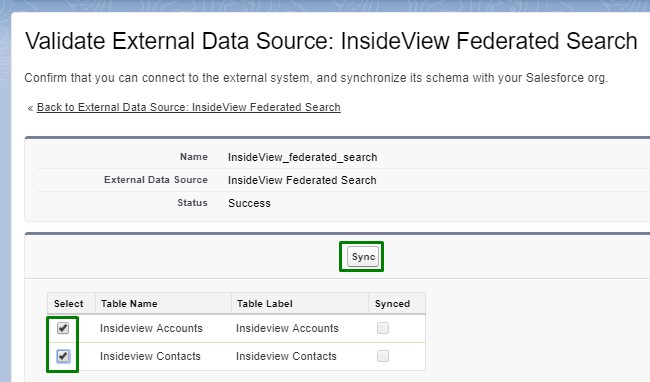
Click Validate and Sync. In the Validate External Data Source page, select the InsideView Accounts and InsideView Contacts check boxes and click Sync.
Note: The sync process might take some time to complete. In case you receive a time out error, click Sync again. If you receive a timeout error again, follow the instructions in “Time limit exceeded” Error in our Knowledge Base to resolve this issue. Once the sync is completed, InsideView Accounts and InsideView Contacts will be listed under External Objects on the External Data Source page as illustrated:
|
| 5 | Add Demandbase custom tab | To configure Demandbase custom tab, follow the instructions in the Configuring Demandbase in Page Layouts and the Custom Tab in Salesforce Lightning Edition article in our Knowledge Base. |
| 6 | Use federated search | To use the Demandbase federated search, open any Salesforce app in App Launcher and enter your search keyword on the Salesforce search bar. To learn more tips and tricks on how to use federated search, read the Search Tips article in our Knowledge Base. |